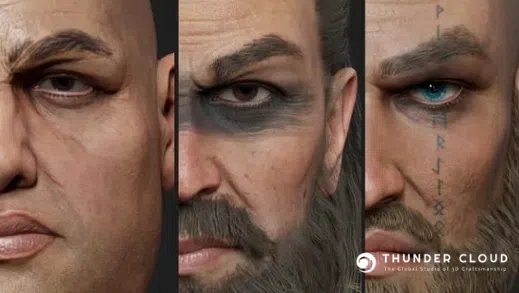
The Viking character assets are one of the latest 3D Character creations by the 3D production team at Thunder Cloud. Faced with the challenge of recreating strong and battle-worn Viking warriors, we had an exciting time working on this project and gained valuable experience for future endeavors. Today, let’s take a tour through our art production pipeline and share the insights we’ve gathered along the way!
I. Overall Introduction
Norse mythology has always been an endless source of inspiration for literature, film, and especially games. Many of us have felt the excitement of following Kratos and his son in their epic battle against the most powerful gods of Norse mythology in God of War, or experienced Eivor’s intense quest for vengeance in Assassin’s Creed: Valhalla.

From the standpoint of artists—those who love games, play games, and are also involved in the game development process—, the fascination with Viking characters is undeniable. Their distinctive attire, bold and courageous personalities, and their willingness to fight and sacrifice to protect their ideals are truly captivating. It’s no wonder these Vikings continue to appear in new releases year after year.

These works inspire us greatly, leading to the question: Why not create our own Viking characters? This marked the beginning of our journey into Viking 3d character models.
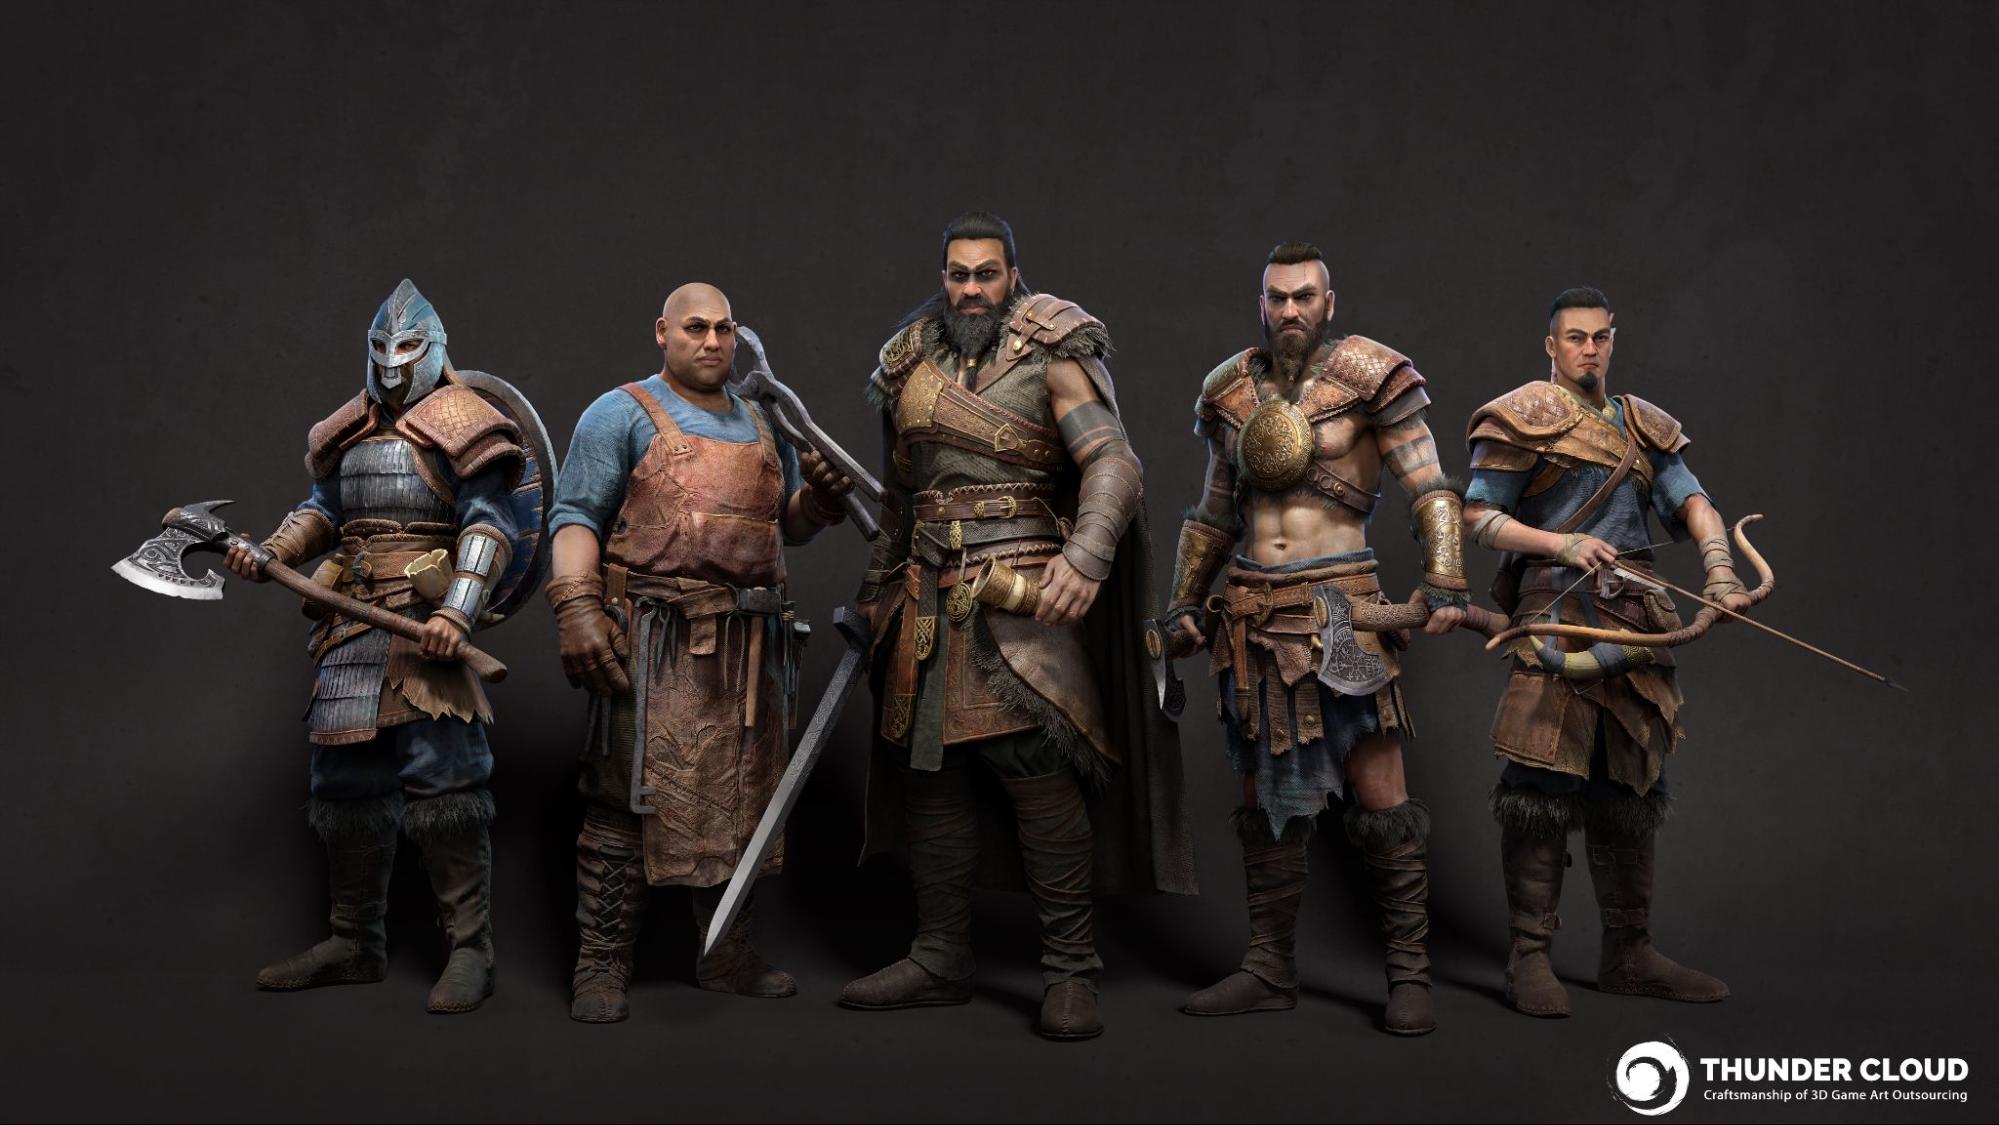
By aiming for the high standards seen in top-tier games like God of War, Assassin’s Creed Valhalla, and For Honor, we started defining our goals for the characters we wanted to create. They must be impressive characters, aligned with the Viking aesthetic. These character models will be created in a realistic style and must also be highly functional, ready for game use.
Defining the style in advance is crucial as it affects the entire asset creation process. Unlike the stylized style – focusing on the shape abstraction, exaggerated proportions, and vibrant colors – the realistic style aims for accurately representing real-life features, including the depiction of human skin & anatomy, clothing, armor, and materials.

That why Artists would need to invest a reasonable amount of time for research, referencing to have a better understanding of how real world human figures look and how realistic materials behave in a natural way.
For example, to sculpt or build a piece of clothing, we need to know how it looks in real life, the structure of the clothes when they are sewed together, how hard/ soft the surface would be when touching, how the piece of cloth behaves in gravity, pressure etc… The same goes for such complex features such as human face, hair, skin, etc… which would require even experienced 3D artists to actually study and analyze carefully before going to production.
Additionally, these are character designs for games, so they must meet game-ready model technical requirements.

Character modeling for a game needs to perform various complex movements almost in real-time with player interactions. Therefore, these models must have precise topology to ensure accurate shape and effective rigging and skinning. They also need to be optimized to ensure smooth performance in the game. For tips and tricks on handling topology, you can refer to Thunder Cloud’s article at the link:
“Topology for Low Poly Game Characters : Essential Tips and Tricks”
With clear goals and requirements in mind, Let’s explore the steps to create Viking 3D model characters with Thunder Cloud
II. Project Breakdown
A.Concept Art
Searching for references, Google pictures, YouTube, are our best recommended tools to find photos and other materials. But in this package, to maintain a consistent final quality, we gathered numerous 3D showcase images of top-notch characters from globally renowned AAA games like God of War, Assassin’s Creed Valhalla, and For Honor as benchmarks. These serve as quality guidelines for future 3D artists to follow.

In this process, we gather numerous images related to the aforementioned games


By observing and analyzing 3D model characters from AAA games, we can clarify the vision for our upcoming characters while also defining ideas for their outfits, personalities, and stories.
Keep in mind that reference is crucial, not committing enough into research will probably end up with half baked, uncanny looking for either face, hair, or outfit model. This is the common mistake which many artists encounter.
B. Breakdown concept / planning
Abraham Lincoln was quoted as saying, “Give me six hours to chop down a tree and I will spend the first four sharpening the ax.”
With experience gained from numerous projects in the Thunder Cloud production pipeline, both large and small, we understand that preparation is undoubtedly a crucial step. It says a lot about an artist. It reflects an artist’s ability to thoroughly evaluate a concept and then break down those evaluations into specific tasks.
This step involves three key aspects:
- Identifying which distinct objects need to be modeled separately and which can utilize symmetry.
- Determining the number of UV sets required.
- Finding reference images.
These three factors are crucial for accurately assessing the workload for a character concept.
1. Identifying Unique and Symmetrical Objects
Specifically Thunder Cloud workflow speaking, the team typically marks these objects by painting over (PO) the concept with colored lines.

This is usually a quick PO to evaluate what can be reused and what cannot. Having a specific plan on what to do helps avoid overlap in the workflow.
2. Planning UV Usage
This step directly impacts the quality of the textures. Certain parts of the model, such as the face, eyes, hair (due to haircard technical requirements), and skin, will always need their own UV map. For the remaining parts, like clothing, experience is needed to effectively allocate UV space.
Additionally, optimizing the model and UV layout should be considered from the start to avoid the need for revisions later and to ensure good optimization.
3. Finding Reference Images
Reference images are essential
A timely reminder can make all the difference

A useful tip for artists is to find images relevant to each stage of the work and organize them neatly. For example, references for high-poly models, LOD0, and textures should be gathered and categorized separately. This organization helps streamline the workflow and ensures a smoother process.
C. Quick Sculpt- BlockOut
Blocking is one of the most important and interesting stages of creating 3D model characters. At this point, there’s no need to be concerned with technical constraints such as triscount or UV mesh. Our focus is on how an experienced artist uses their eyes to assess the created object, checking for a balanced silhouette and ensuring everything appears solid and consistent. This is also the most enjoyable stage of the whole pipeline since artists can freely use their aesthetic abilities to shape the overall visual impact of realistic character.

In this asset pack, the head and base body are created using Quick sculpt in ZBrush.

There are many programs suited for 3D model sculpting out there, but for professional work, ZBrush will be the best choice. Therefore, in this stage, we mainly sculpt with Zbrush to establish the basic form of the character, ensuring it closely resembles the concept when viewed from a distance.
Clothing is blocked out using Marvelous Designer to quickly create folds and wrinkles.

This approach proves more efficient than manually sculpting fabric details, as it provides faster and more precise results. Artists only need to focus on controlling stiffness and placement of major wrinkles, etc
For hard surface assets such as tools, accessories, and armor, most of the work is done in Maya.

It’s possible to complete everything in a single software such as Maya or Zbrush, However, at Thunder Cloud, we are often encouraged to use a variety of software that they are proficient in. Personal workflows that ensure efficiency can also be recommended for use. In this way, we continuously update and discover faster and more accurate ways to get things done.
At this stage, assets like clothing, belts, and armor should not have thickness. They should remain as flat planes with low polycount to facilitate adjustments to the character’s overall shape.

For hair, detailed work is not necessary at the block-out stage. A quick sculpt to indicate the hairstyle and major hair flows is sufficient.

D. Mid-poly
After finalizing the overall shapes and proportions through the quick sculpt, we’ll refine each part using Maya or Zbrush to create a clean, smooth 3D model with crisp lines and surfaces, at a moderate mesh density that provides a solid foundation for the character High Poly Stage later

At this stage, the focus is on evenly distributing topology density and setting edge loops to preserve the form of the mesh when increasing subdivision levels, preparing the model for transition to software like ZBrush. For additional tips & tricks on handling topology and setting edge loops, refer to TCS’s article on Topology available at the following link:
“Topology for Low Poly Game Characters : Essential Tips and Tricks”
Assets such as clothing and armor are also given thickness and edge loops to ready them for high-poly modeling.

At this stage, the large proportions and general shape from the previous step must be maintained and built upon. Essential features like the face and body will be detailed meticulously to ensure the character’s demeanor evolves closely with the concept, avoiding deviation.

Additionally, Polypainting will be applied to preview facial expressions more realistically. Mainly, significant and intermediate details will be carefully crafted in this stage to ensure structural integrity and alignment with the design concept. Moreover, foundational meshes will be UV mapped to prepare for detailed work in subsequent steps.
E. High-Poly
The primary goal of this stage is to develop high-quality high-poly models that meet the standards of top-tier games like God of War. Achieving this is a considerable challenge due to the demanding quality standards involved.

The main goal of this stage is creating the most accurate render of the shape and geometry of the object being modeled. This is when we start adding details in Zbrush. We use ZBrush as it offers the best functionality and quality. Micro details on material surfaces, patterns, etc., are incorporated and meticulously controlled through a layer system to ensure easy editing when needed because we focus on the maximum realism and authenticity in the character modeling.

High-poly modeling is the most intricate stage of creating realistic characters. In this section, we’ll cover the key elements and how to approach them:
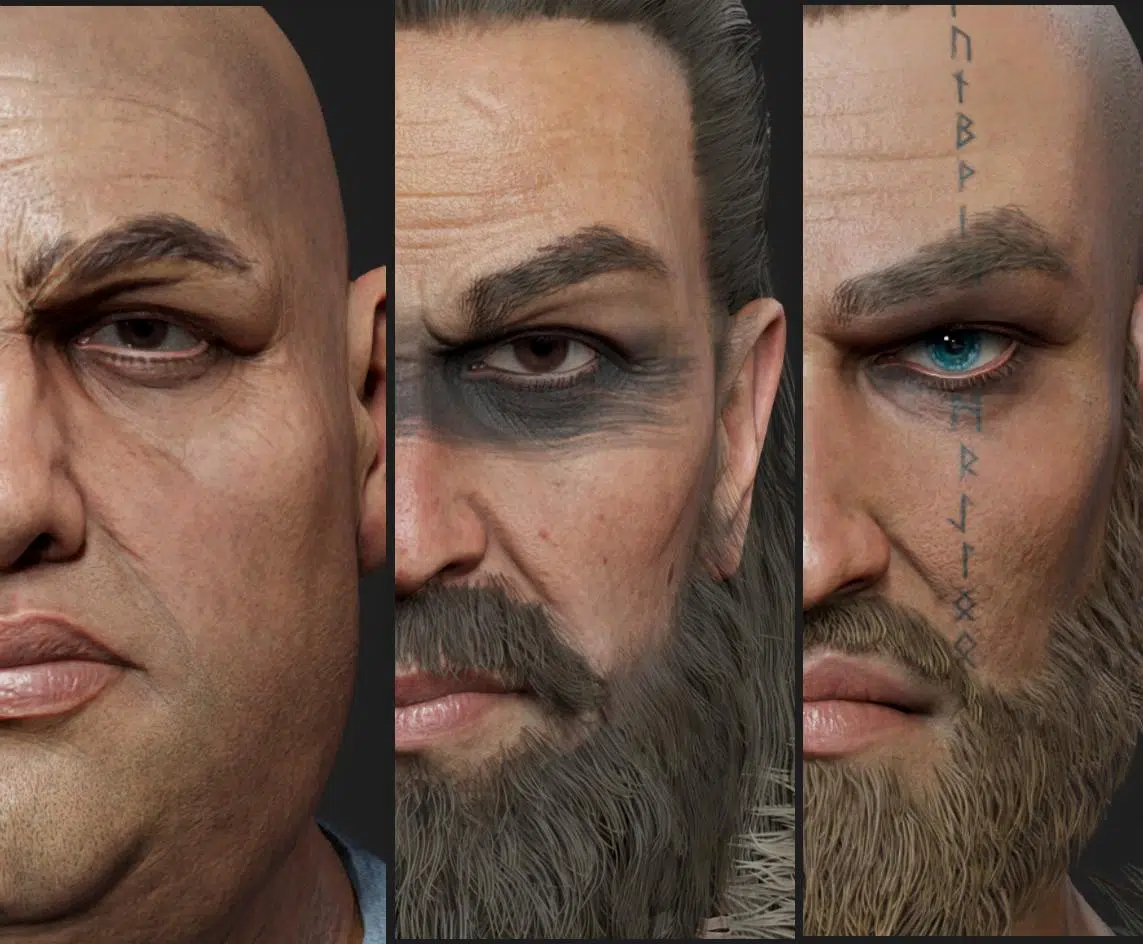
Head and face:
This area presents the greatest challenge, requiring high precision in both anatomical accuracy and the unique features that define the character’s face. This work is usually handled by the most experienced and professional artists within the Thunder Cloud team.
a. Anatomy and topology:
When analyzing the face, we understand that it reflects the characteristics of different ethnicities and regions, as well as aspects of personality and environment.
For further insights into the anatomy and topology of the head and face, you can refer to TCS’s previous article on head topology at the following link:

b. Human’s face is not Symmetry:
A common mistake in creating realistic high-poly faces is treating the facial structure as symmetrical.

While this may be seen in stylized characters, it’s essential to avoid it in realistic models. Realistically, no face is perfectly symmetrical, there are always subtle differences between the two sides.
Symmetry can be useful in the early stages to quickly determine the position of facial features, but it should be turned off in the final stages to capture the unique features of each side and achieve a more natural and lifelike appearance.
c. Winkle and secondary form

Once the primary forms defined by muscles and bones are in place, the next focus is to add wrinkles caused by facial movement. Pre-made XYZ texture maps often do not accurately capture these wrinkles, as their placement and clarity may not align with our concept. Therefore, these wrinkles are manually created to match the intended design.
d. XYZ texture

However, it’s important to remember that XYZ textures should be used as the final step, once the model is fully detailed.
You can find XYZ texture maps at: https://texturing.xyz/
Tutorials for applying XYZ textures using tools like ZWrap are readily available on platforms like YouTube. If interested, you can further explore these resources.
Clothing:
Although less challenging than the head & face, creating clothing still presents its own difficulties. Common materials used in clothing include fabrics, leather, and metals (for armor and accessories), each requiring its own specific method for modeling.
a. Fabric

Thunder Cloud’s artists use Marvelous Designer for the blockout and mid-poly stages. Thus, when moving on to high-poly modeling, our focus is to add small folds and accurately represent the fabric’s surface texture. Major shapes and folds have already been established through Marvelous Designer’s simulation.

When using ZBrush’s Noise Maker tool, it’s important to note that assets like pants and shirts should have their UVs drafted according to the actual construction to ensure precise surface details.

This ensures that surface details align with the garment’s structure, enhancing the asset’s realism.

In this example, surface details appear to run across the body and sleeves, even though these are actually two separate pieces of fabric sewn together.
When cutting UVs, you can switch the Noise Maker’s wrap mode to UV, ensuring that surface details follow the correct orientation of each garment part.
Additionally, using UVs helps resolve issues with noise distortion when wrapping around curved surfaces.

b. Leather
In these Viking characters, leather is used extensively. Representing leather requires a slightly different approach compared to fabric.

Similar to fabric, the large folds in the leather are created using Marvelous. The key factor here is setting the correct stiffness for the leather to achieve the most accurate result. Detailed refinements are then done in ZBrush.

A notable feature of leather is that the surface material differs from the inner material.

Creating this effect is relatively simple. Begin by quickly drafting UVs of the mesh in Maya, with the goal of separating the UV for the thickness.

Once in ZBrush, you can easily separate the thickness using the Polygroup tool.

After detaching the thickness, use Mask, Layer, and Noise Maker tools to create two distinct surface details for each part.

c. Metal
Metal doesn’t have many special tips or tricks for handling. Here, we use brushes from the “Easy Metal Surface” pack, combined with some basic brushes. You can find and purchase this brush pack at this link:
https://www.artstation.com/marketplace/p/VnOj/easy-metal-surface-brushes-pack

Norse mythology details frequently appear on the clothing or armor of Viking warriors. For guidance on creating these details, refer to the quick tutorial here.

Hair:
In the high-poly stage, hair not only serves as a preview but also helps in creating curves for the hair cards in later stages. At this point, we use ZBrush’s Fiber Mesh tool and various hair brushes to manage the hair details.

Summary: By effectively carrying out the above tasks, this is the 3D Models characters at hipoly stage.


F. LOD0 + UV
1. About model
In the high poly stage, the entire realistic characters are built at ultra-high resolution to capture as much detail as possible. However, when it comes to the Lowpoly stage, we focus strictly to technical skill to create a version with lower mesh density, aiming to reduce the number of polygons to the optimal level and build the correct topology suitable for animation, as well as clean up the UVs to meet industry standards for AAA in-game models, keeping it light enough for animation and used in the game engine.

A key aspect of low-poly game art is the general shape and silhouette of your models. Ensure that each model has a distinct and recognizable outline, even from a far distance. A tip and trick to achieve this is to invest polygon density into strong, defined shapes, smooth curvature edges and curve angles to ensure the form of your models matches with the high res model.

This is a highly technical stage, emphasizing the importance of managing topology. Once again, I recommend reviewing Thundercloud’’s article on Topology for low-poly characters to better understand topology management and how to prevent bake errors at this stage.
In Thunder Cloud’s art production pipeline, we use Maya for low poly modeling and Marmoset Toolbag for baking textures. We find Toolbag to be the superior baking solution due to its comprehensive and user-friendly tools, well structured and organized automated group baking which makes the baking process to be much easier but ensures the high-quality texture maps.

2. About eyes
Many artists mistakenly treat the eye as a complete sphere, which is not realistic.

A closer look at the actual anatomy of the eye reveals that it features a protruding cornea and a concave structure behind it, consisting of the iris and pupil. It is this combination that creates a realistic eye structure.

Using only a single layer can lead to inaccuracies in the appearance of the iris, as shown in the image:

Thus, the current task involves accurately reconstructing the eye’s actual structure.

Layers 2 and 3, as mentioned earlier, represent the cornea and the pupil. Layer 1 not only represents the liquid surrounding the eye but also mimics the shadows cast onto the eyeball by the eyelids and eye socket. This shadow effect is often not accurately represented in lookdev, which can make the character’s eyes appear unnaturally wide open or goggle-eyed.

Beyond Eye AO, another often overlooked aspect is the tear buildup at the lower eyelid.

This tear layer, situated between the eyelid and the eyeball, should be modeled separately to create a realistic tear ring around the eye.
3. About hair
There are several techniques for creating and arranging haircards. For the Viking characters, we utilized the high-poly hair generated with Fiber Mesh.

Since Fiber Mesh already provides edge flow for the hair strands, we simply converted these strands into curves in Maya to set up the major guides for the hair. We then used GS CurveTool to fill in any remaining gaps.

The beard was also created using a similar approach.
G. Texture
Texturing is a complex and creative stage. During this process, the elements of the model are given the properties of materials, such as color and shining, micro-details, various defects, etc. If you’re good at applying textures, you can really breathe new life into your 3D character models.
In this stage, baked maps from the previous step and the low poly modeling with standardized UVs are reused to create textures. Everything is imported into Substance Painter to begin texture work.

We adjust the PBR parameters in Substance Painter to ensure materials react as realistically as possible and add numerous color details, creating the most accurate physical reaction to reality and dirt to create a sense of real-world impact on the overall material.
During the process, some minor assets can be quickly textured using pre-set Smart Materials from Substance Painter or paid texture packs.

The advantage of Smart Materials is that they can significantly speed up the texturing process while delivering output quality that closely matches the requirements.
However, Smart Materials do not always perfectly align with specific needs, so artists must have a solid understanding to correct them as necessary.

The output from Substance Painter includes maps such as Diffuse, Normal, and a mixed ORM map. Hair and skin are exceptions, often requiring additional texture maps to fully represent their details.

Facial rendering and hair simulation remain particularly challenging aspects in realistic art style because if you do not do well enough, characters will look fake. There are a lot of approaches for face but we used XYZ & ZWrap for face micro texture. These tools and library provides lots of magnificent, ultra high resolution photo realistic textures to work with. However to get the look nice and right, the base facial and sculpture is still mandatory.

For skin textures, in addition to the basic support maps like Metallic and Roughness, we also incorporate a Subsurface Scattering map alongside to create realistic translucency for the skin in later lookdev phases.

For hair textures, we use Fiber Shop to generate texture maps.


Throughout this process, we regularly compare with render previews to make adjustments to the textures and ensure they meet our expectations. Marmoset Toolbag 4 is our tool of choice for previewing these assets. Detailed information on how we set up hair materials will be covered in the next section of this article.

No matter the tool used, the knowledge and research on real life clothing is still a must for artists to be able to get the model right and replicate the behavior of the clothing on the human body with precision.
H. Rigging
Now is the time to make the 3D character modeling ready for animation. In this step, essentially, after the characters have been done with a clean low poly modeling and detailed textures, it’s passed to the rigging department, using Maya to create bones and a control system allowing the character to be animated, moved, posed, etc. In the case of a humanoid character, you can use a standard skeletal rig and tailor it to your model.
Given that this pack focuses on realistic styles, the LOD0 characters typically have a higher tris count compared to stylized assets. While topology requirements are still satisfied, performing skinning directly on these models can slow down the computer considerably. In such cases, we use proxy meshes to address this issue.


By performing skinning on these proxy meshes, processing speed is greatly improved.
Another advantage of using proxy meshes is that it allows for mirroring the character’s skin weights. Since realistic characters often lack symmetry in their topology, manual mirroring is prone to errors.

Our current Viking pack only includes basic rigging for posing. To create realistic animations, a more complex rigging system will be necessary. Before passing it to the rigging team, the 3D character modeling team must ensure that the models meet the required setup standards for rigging readiness such as models must be optimized with nice correct edge flow following industry standard, or they also need to be separated into organized logical parts.
I. Lookdev, rendering
This is also a rather interesting phase that requires a high level of aesthetics. It not only demands technical skills but also the artist’s finesse to place lighting and shaders in a way that ensures the character’s realism and beauty to the greatest possible.
In this step, the characters will be posed, striking cool and fitting poses that best complement the design’s essence, then, the camera angles are set. Subsequently, everything undergoes an additional material and lighting pass in Marmoset. Rendering makes use of the Ray Tracing feature of this software to achieve lighting that closely resembles reality.
These Viking assets were set up and rendered with Marmoset. A key highlight we want to share about Marmoset is the material setup for the skin and hair, which require more texture maps than other parts, and ensuring these textures are accurately placed and adjusted is essential.


Most of the clothing, armor, and weapons assets follow basic PBR-ORM standards.


The final images of the realistic character must be exceptionally beautiful and accurate from a real-time lighting perspective, capturing the entirety of the original design’s essence and beauty.


III. Wrapping up
We’ve just reviewed the process of creating the Viking 3D characters developed by the Thunder Cloud production team. If you’re interested in obtaining these assets, you can find the pack here:

We have also completed numerous other projects across various genres. Feel free to explore more at:
Artstation: https://www.artstation.com/thundercloudstudio
Website: https://thundercloud-studio.com/

What topic would you like to see TCS cover next in our blog? Share your thoughts in the comments!