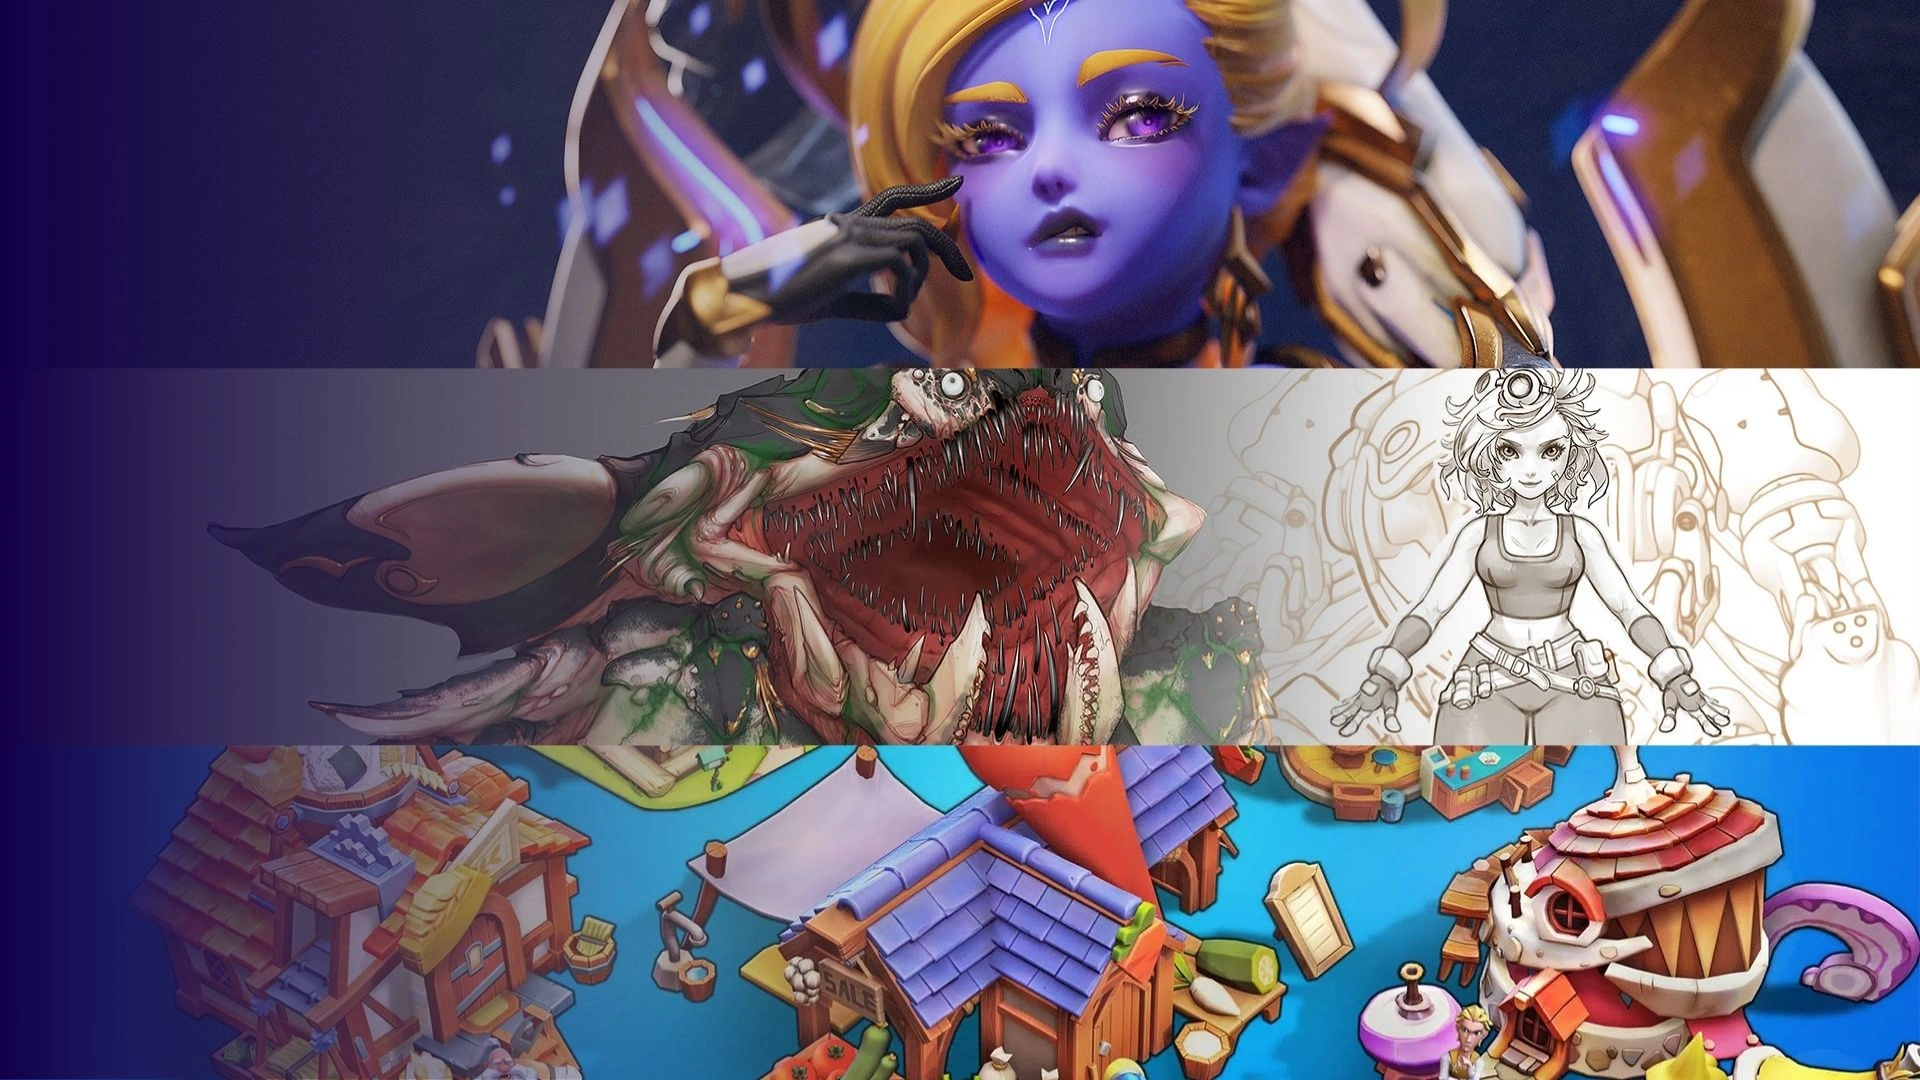
Creating a compelling post-apocalyptic world in Unreal Engine 5 requires more than technical execution, it demands a strong sense of atmosphere, storytelling, and environmental cohesion. At Thunder Cloud Studio, our approach to 3D environment design services focuses on building immersive worlds that feel both grounded and visually striking. In this article, we break down the process behind crafting a post-apocalyptic 3D environment, from early concept to final in-engine presentation.
PRE-PRODUCTION
Reason for choosing Post Apocalyptic as a theme?
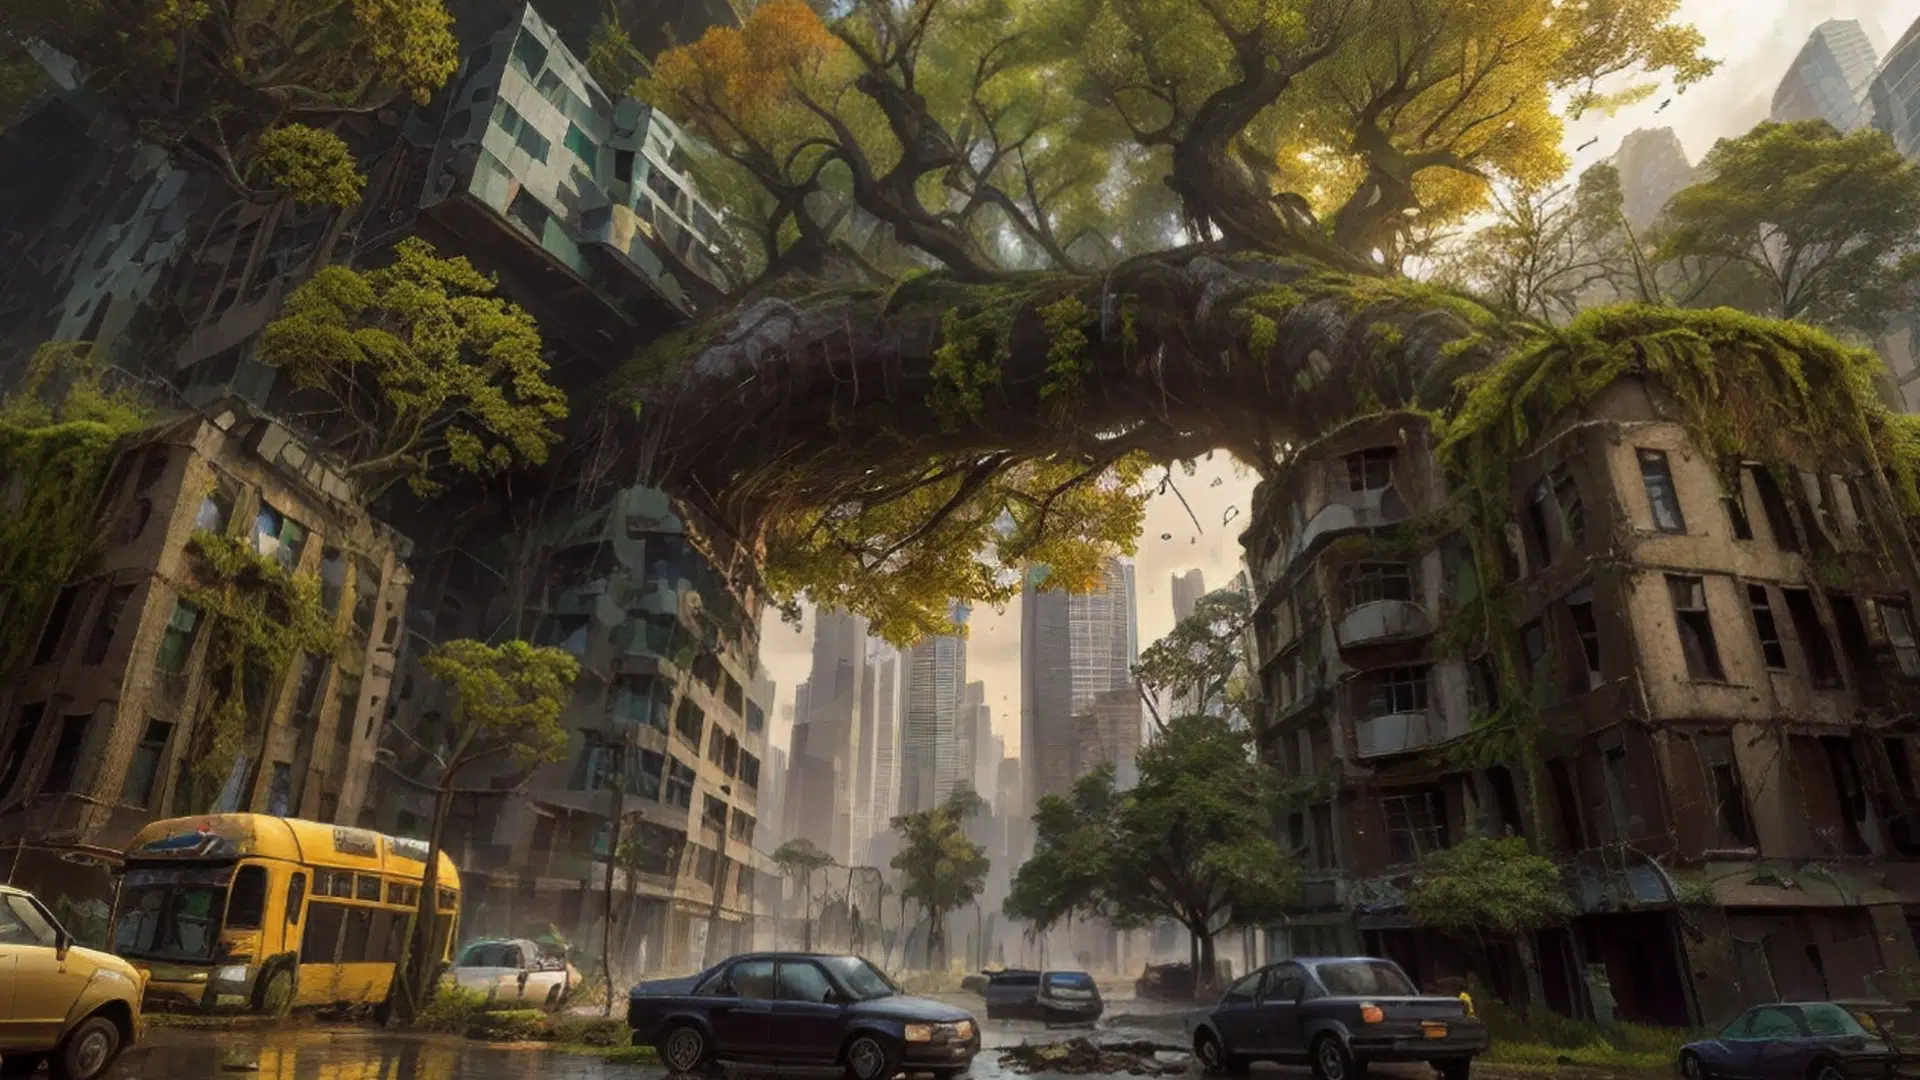
We selected the Post Apocalyptic theme due to its compelling and immersive nature, inspired by influential movies and games such as I Am Legend, Dawn of the Dead, Horizon Zero Dawn, Fallout, and The Last of Us. The theme allows us to explore and create intriguing worlds where nature reclaims urban landscapes, offering both creative challenges and opportunities.

Images from The last of us, Days Gone
What was the process to generate ideas and concepts for this theme?
Reference Board and Photobashing:
We begin by compiling an extensive reference board from renowned sources like The Last of Us and Fallout. This process aligns our vision and sets a clear direction for the project. Through photobashing techniques in Photoshop, we swiftly create detailed overviews of the project’s aesthetic. This step minimizes time-consuming revisions by establishing a solid visual direction from the outset.
Final Concept after using AI to refine
Breakdown Concept:
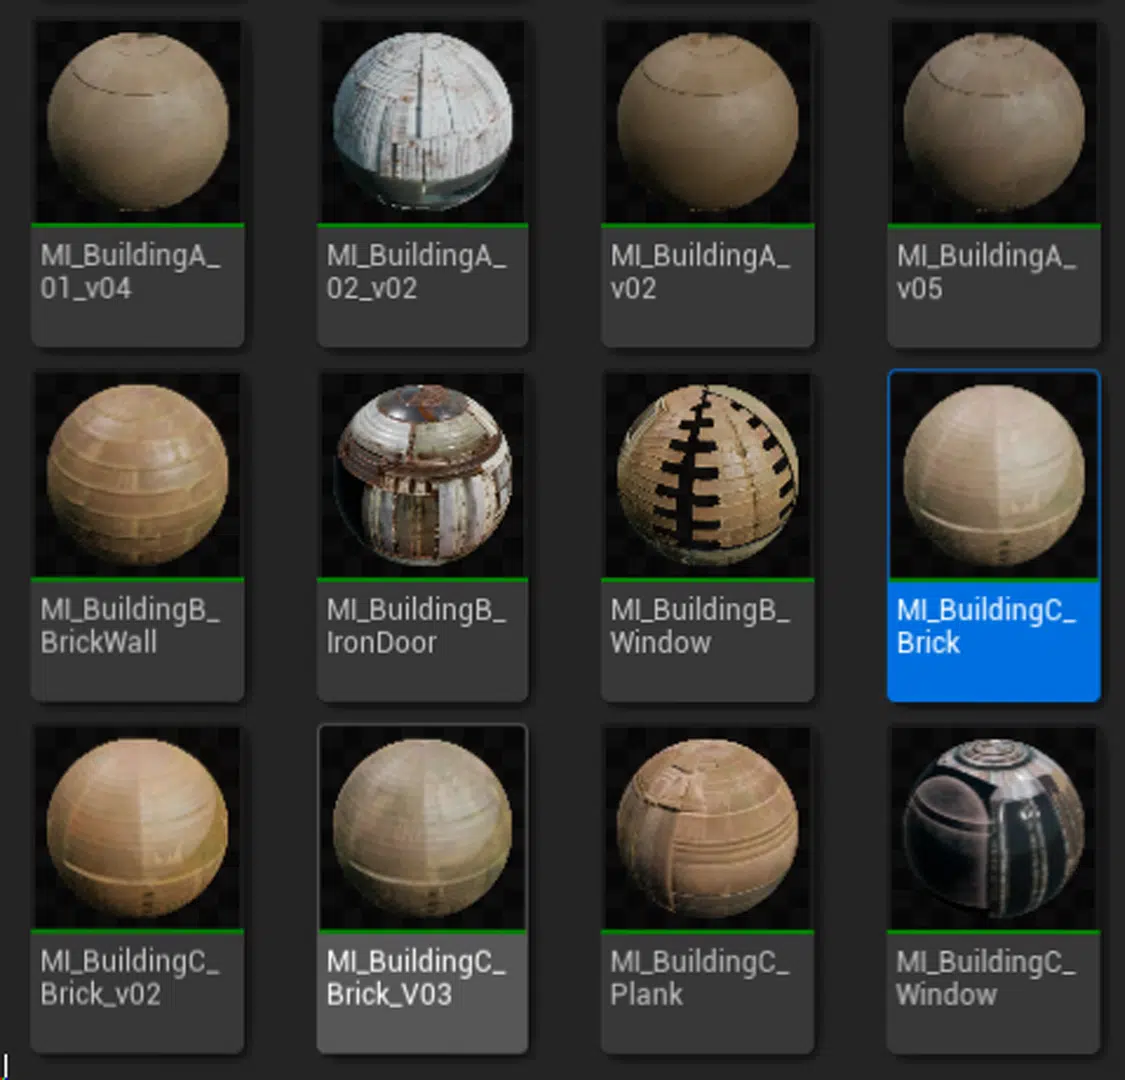
Prior to production of any project at Thunder Cloud, A technical artist from the team will list the major assets and strategize how they can be composed from smaller components. Identifying common elements for shared shaders, textures, and UVs ensures a well-organized production process and saves significant time.
ASSET PRODUCTION
What special things should we pay attention to when modeling and texture assets with the Post Apocalyptic theme?
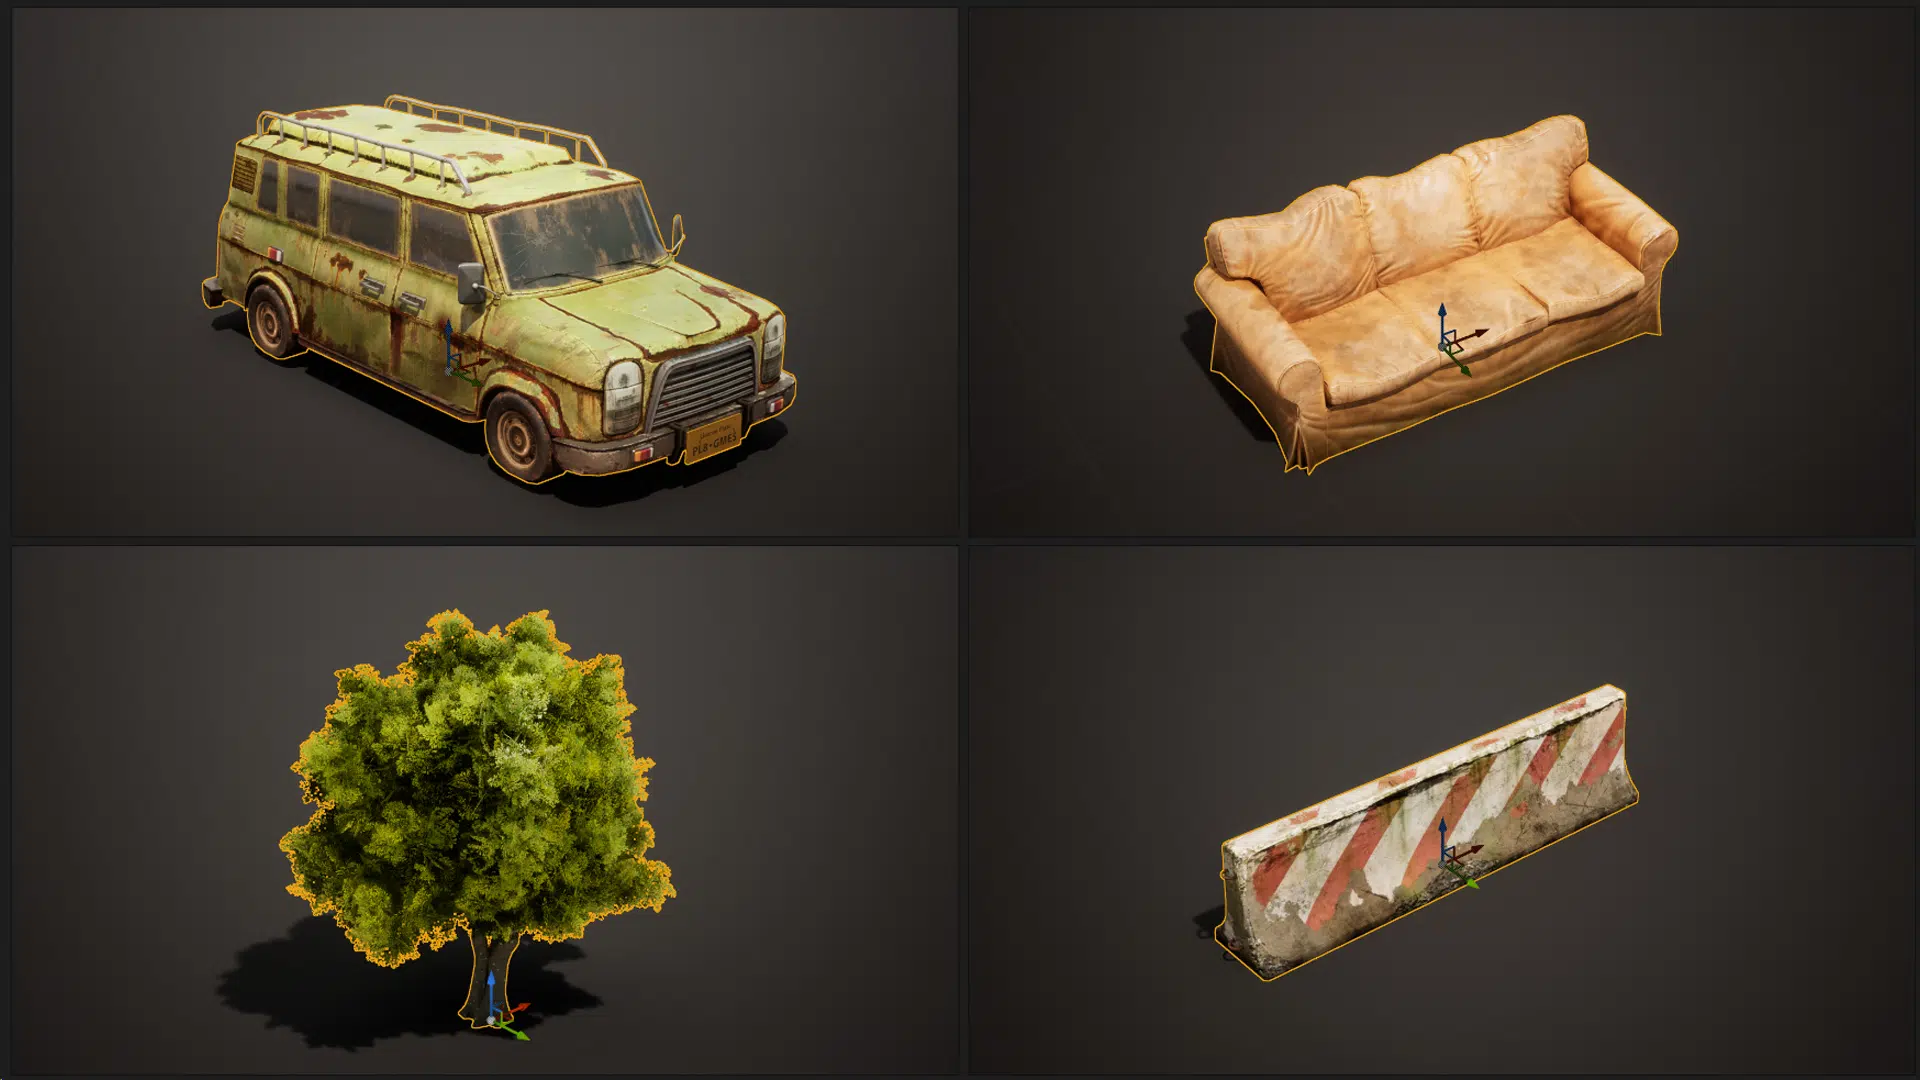
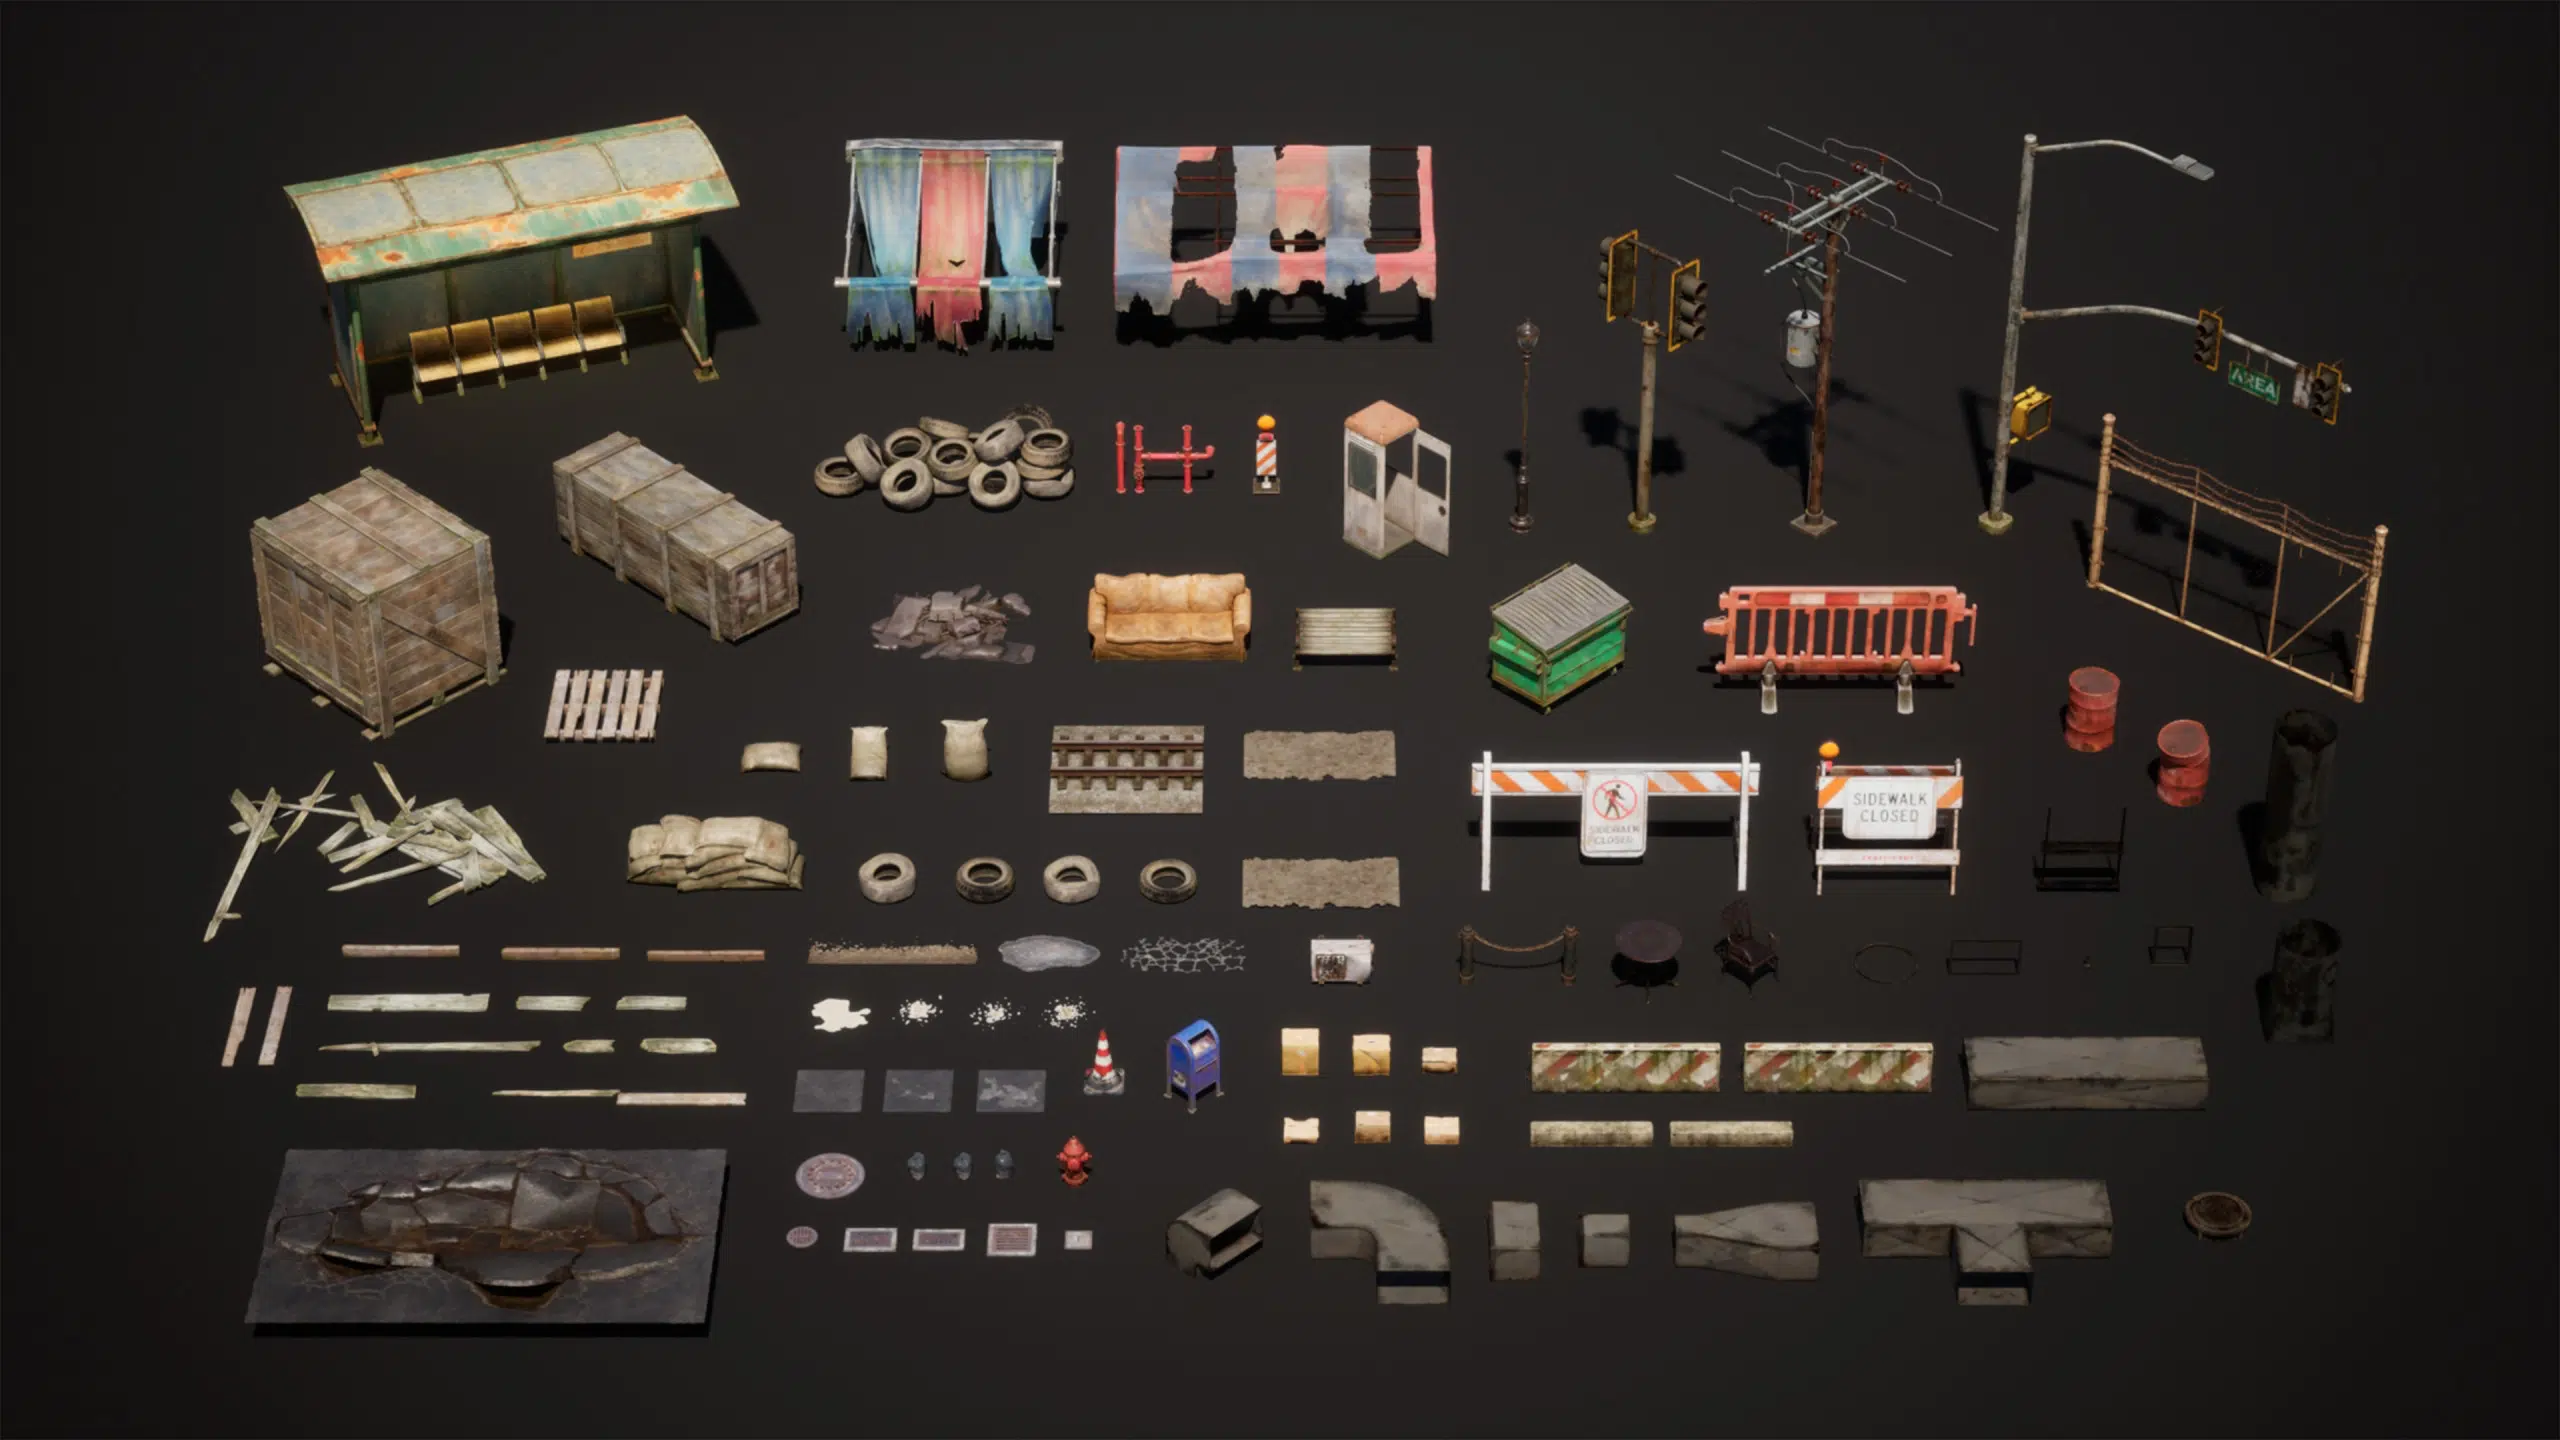
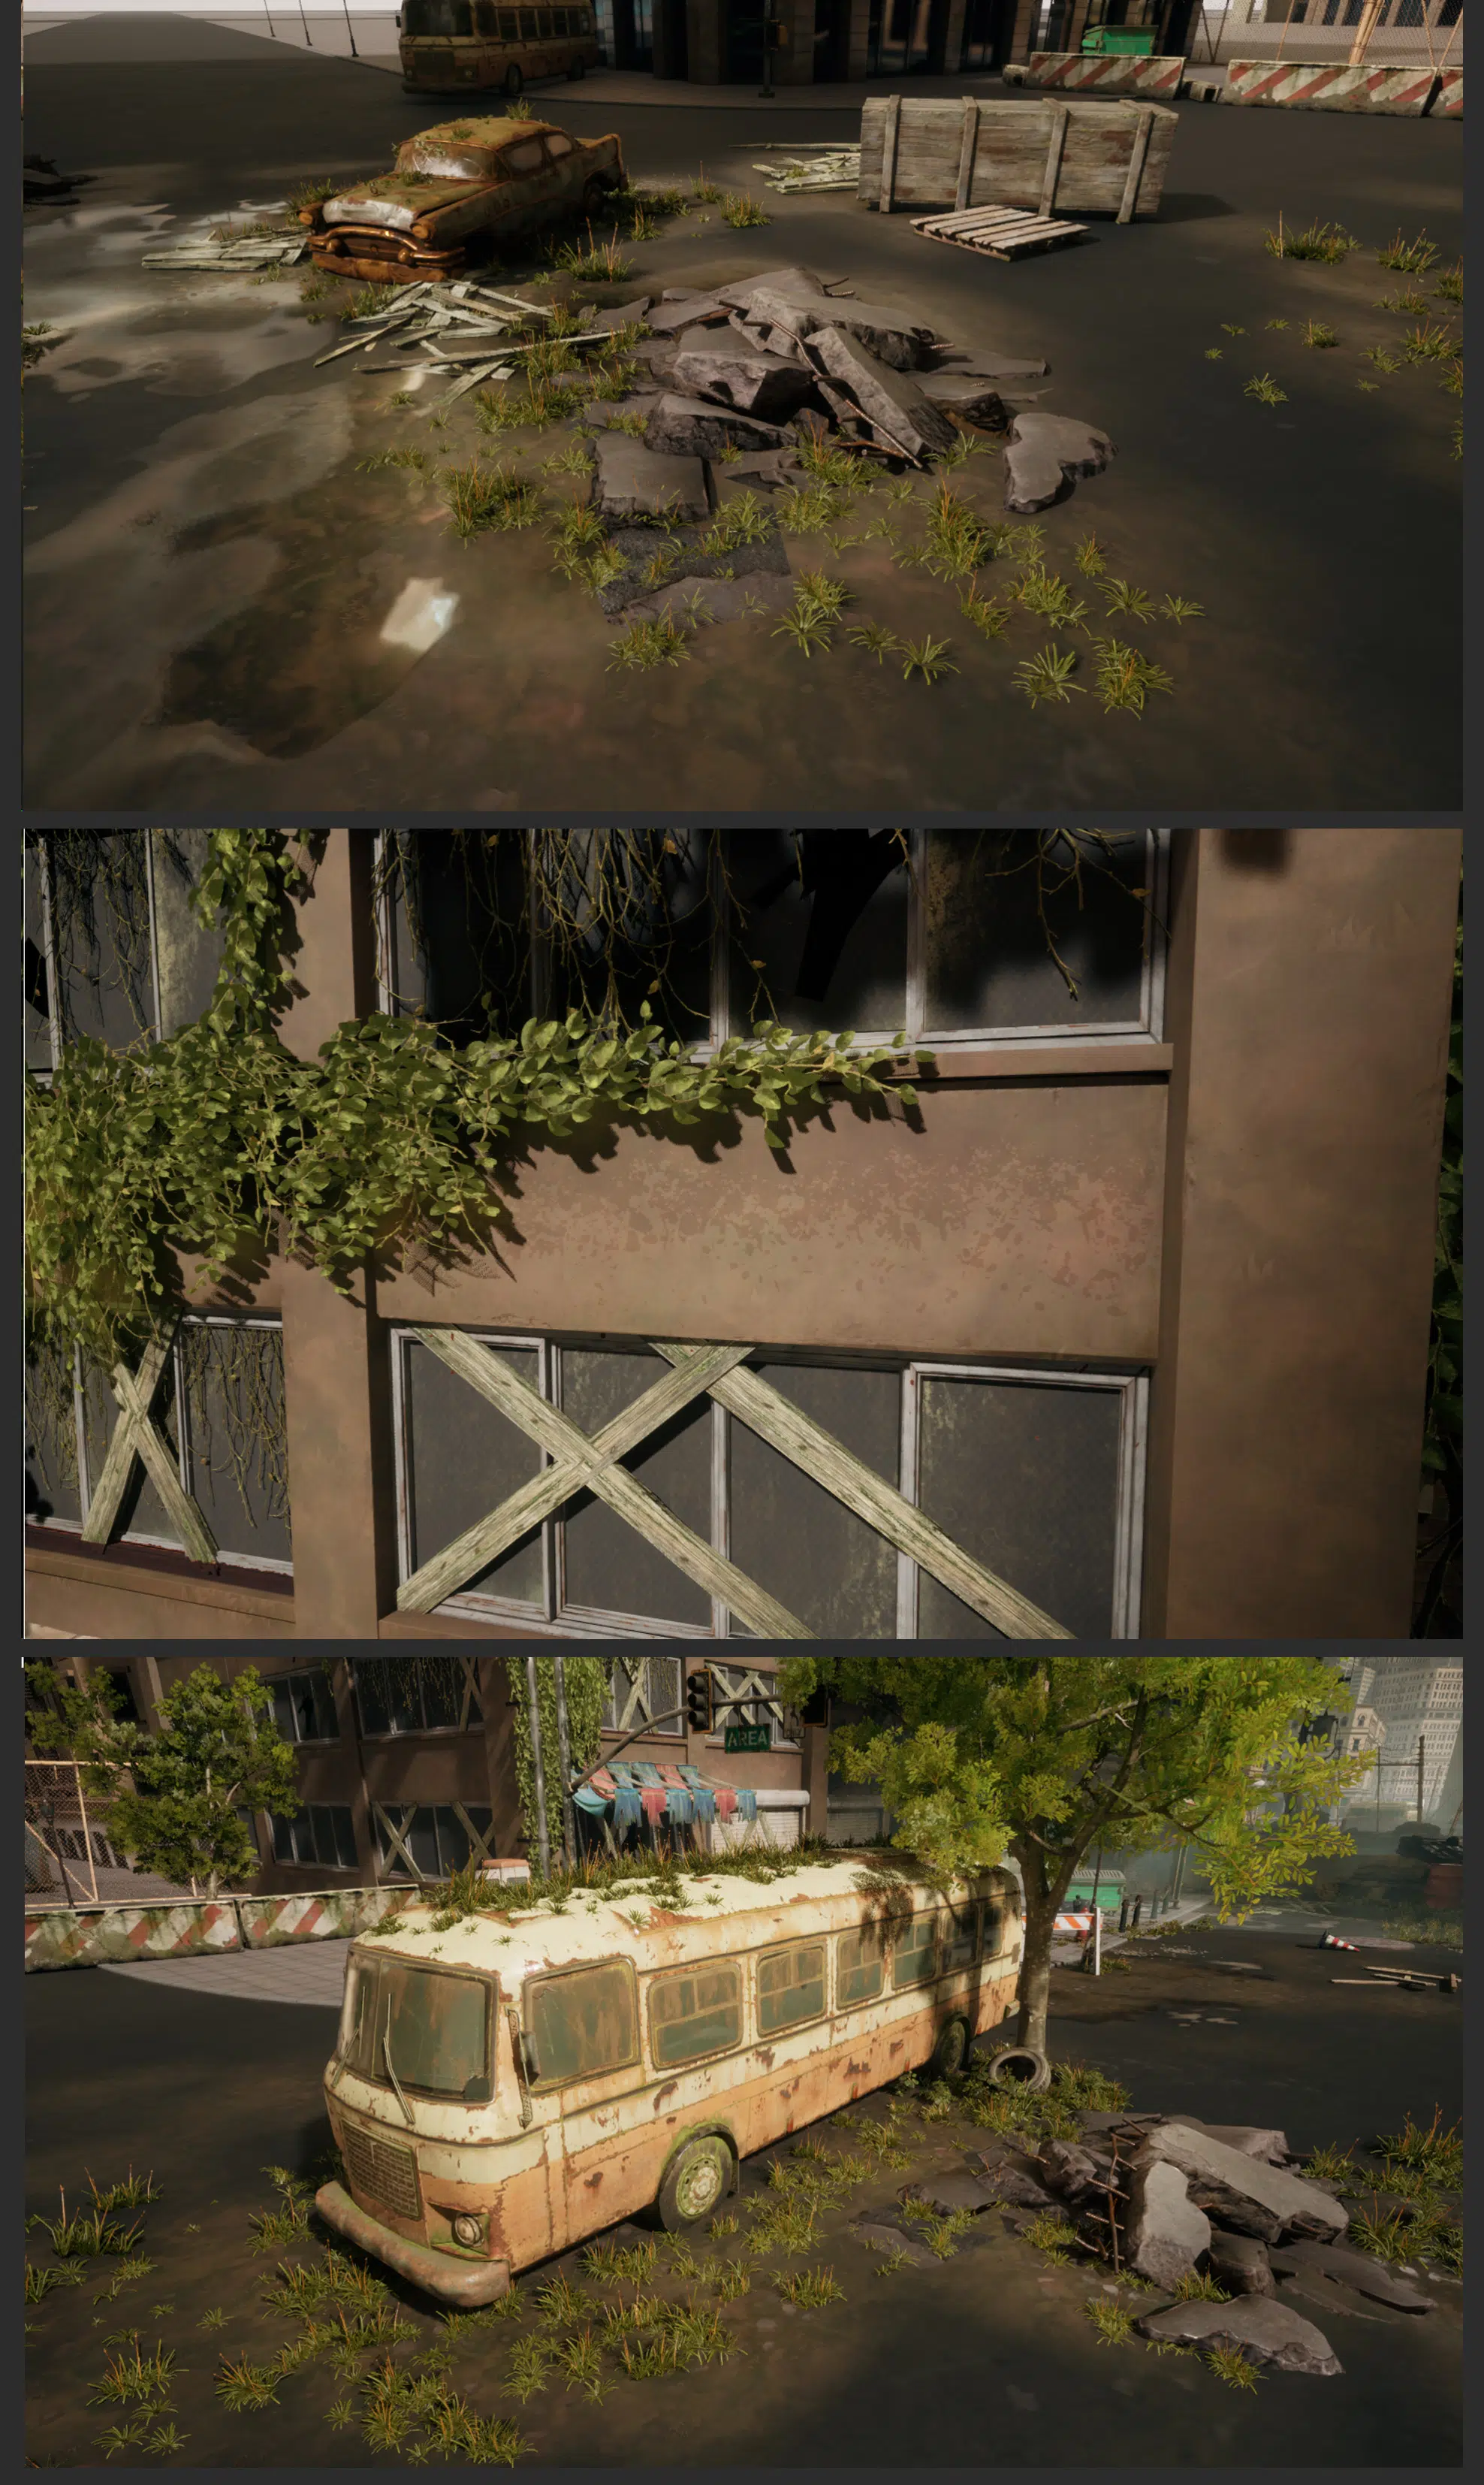
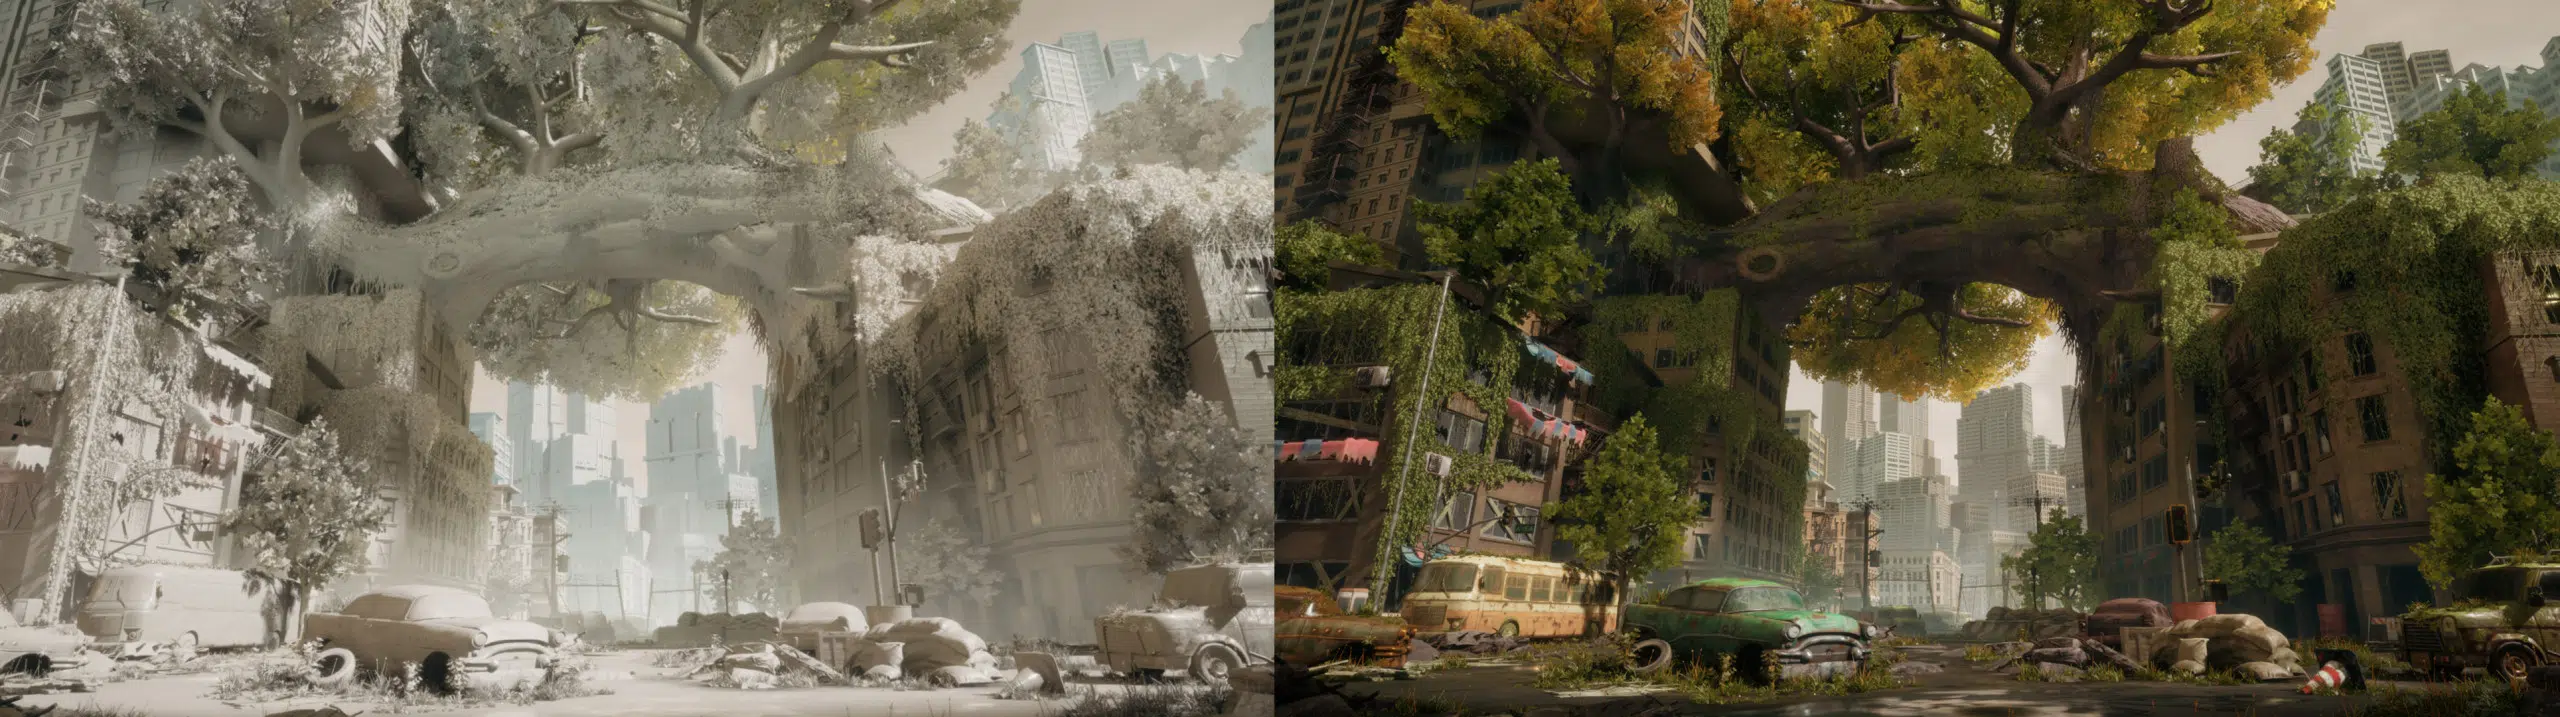
In a post apocalyptic setting devoid of humans, nature’s reclamation of urban environments must be depicted convincingly. Our approach at Thunder Cloud is to emphasize the inclusion of abandoned buildings, broken vehicles, vines, moss, large trees, and asymmetrical details to convey a sense of imperfection and decay. Textures and models feature extensive weathering, grunge, rust, and dirt to illustrate the deterioration of objects.

Ingame Viewport
When multiple artists work on a project, how do you keep the quality of assets consistent when working with a large number of assets?
To ensure the success of the project and achieve the best quality for the output products at Thunder Cloud Studio, it is necessary to establish a Workflow with a clear and strict Q&A system. This process needs to be designed so that all steps, from planning, implementation to testing and approval, are carried out sequentially and systematically. This ensures that each asset goes through many strict testing and evaluation steps, thereby ensuring that their quality always meets the required standards. During the implementation process, good communication between team members is extremely important, helping to quickly detect and correct errors, ensuring that work progress is not interrupted and product quality is not affected.
How are the assets in the package optimized for game dev purposes?
At Thunder Cloud Studio, to ensure optimal performance for game development within the 3D environment, we prioritize mesh optimization, ensuring as few polygons as possible while still maintaining the silhouette of the asset and removing the mesh on invisible sides. We also optimize the UV area so that assets can use 2K textures without losing detail.
We meticulously plan asset creation by breaking down large assets into smaller, reusable components. This approach not only aids in managing complexity but also optimizes the asset production pipeline. By identifying common elements that can share textures, shaders, and UVs, we streamline the creation process and minimize redundant work.
To enhance performance and maintain quality, we focus on mesh optimization by reducing polygon counts and optimizing UV layouts. This ensures that assets are lightweight yet detailed, allowing for efficient game integration and faster development cycles.
Using high-detail collisions within the 3D environment helps physical interactions to be more accurate and realistic, ensuring that interactions such as force feedback and collisions of objects are accurately reproduced, contributing to a more immersive and vivid experience for users.
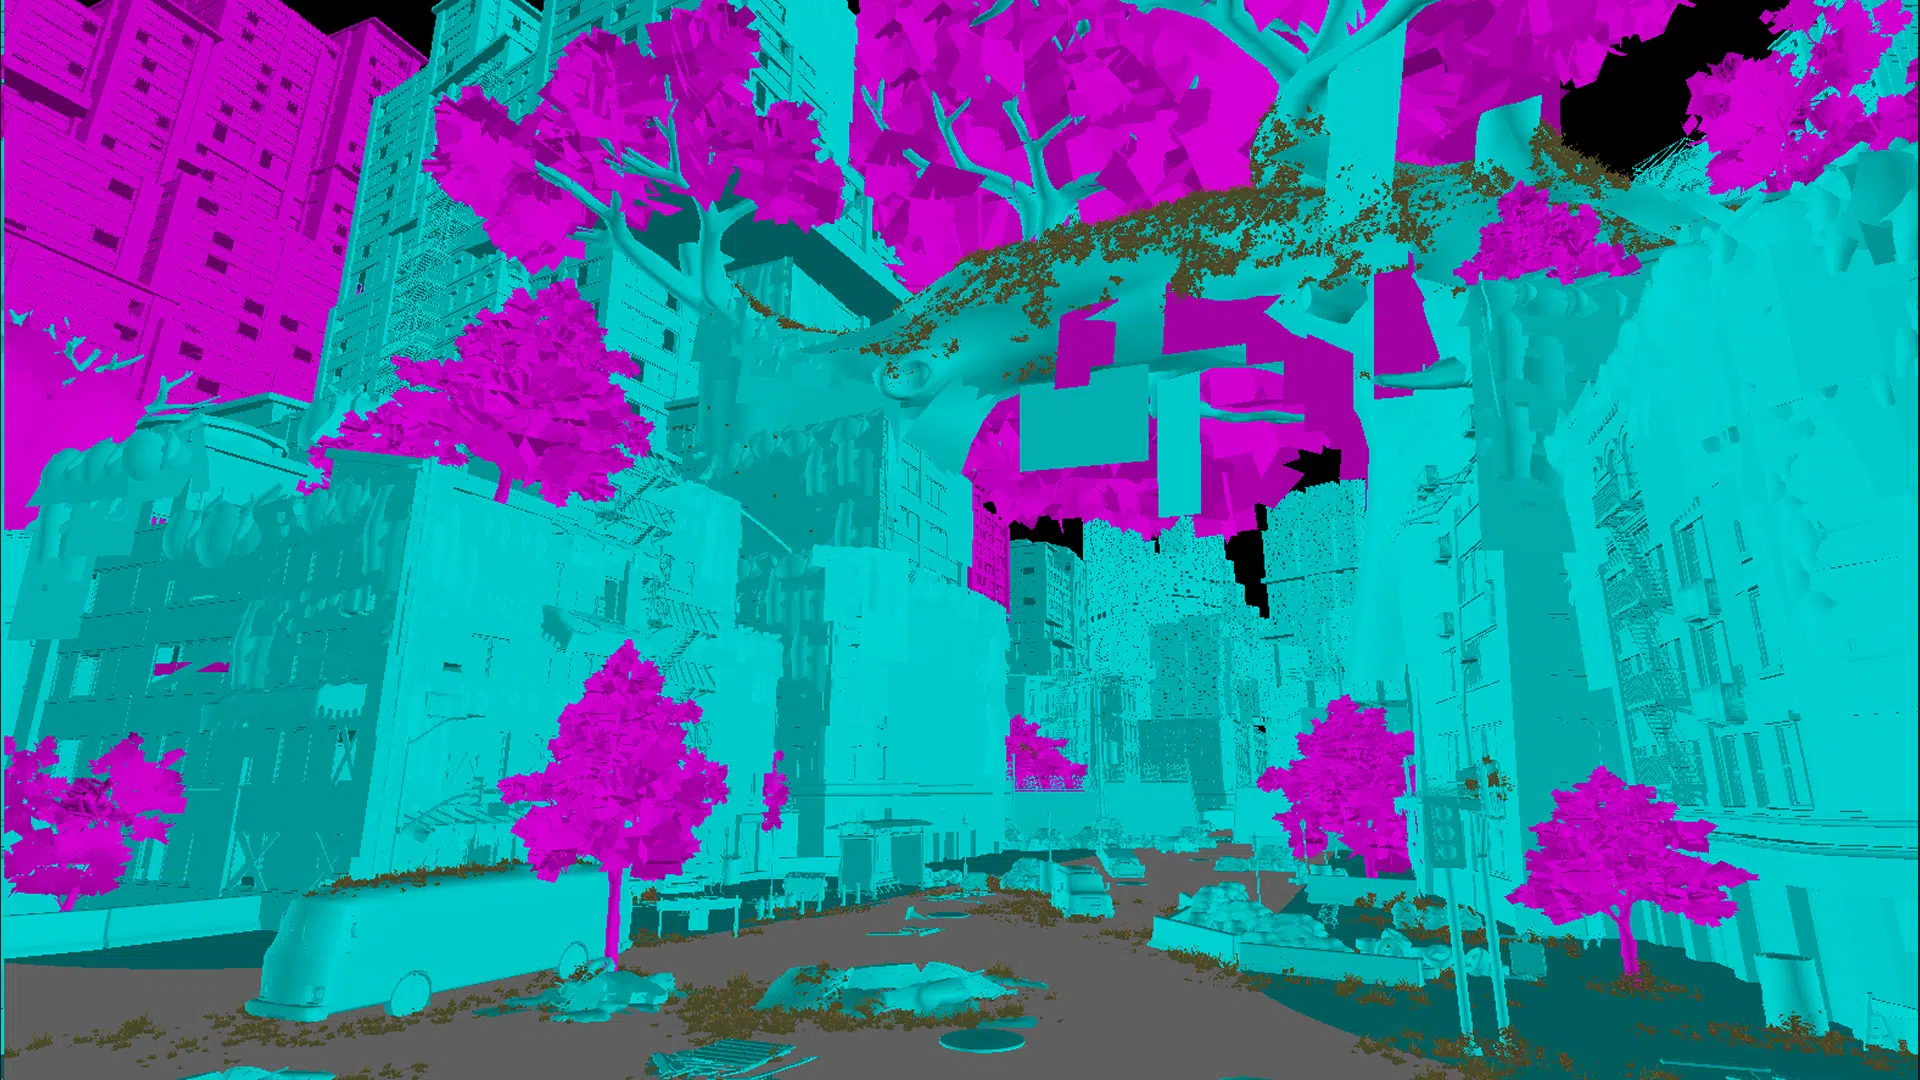
Collision viewport
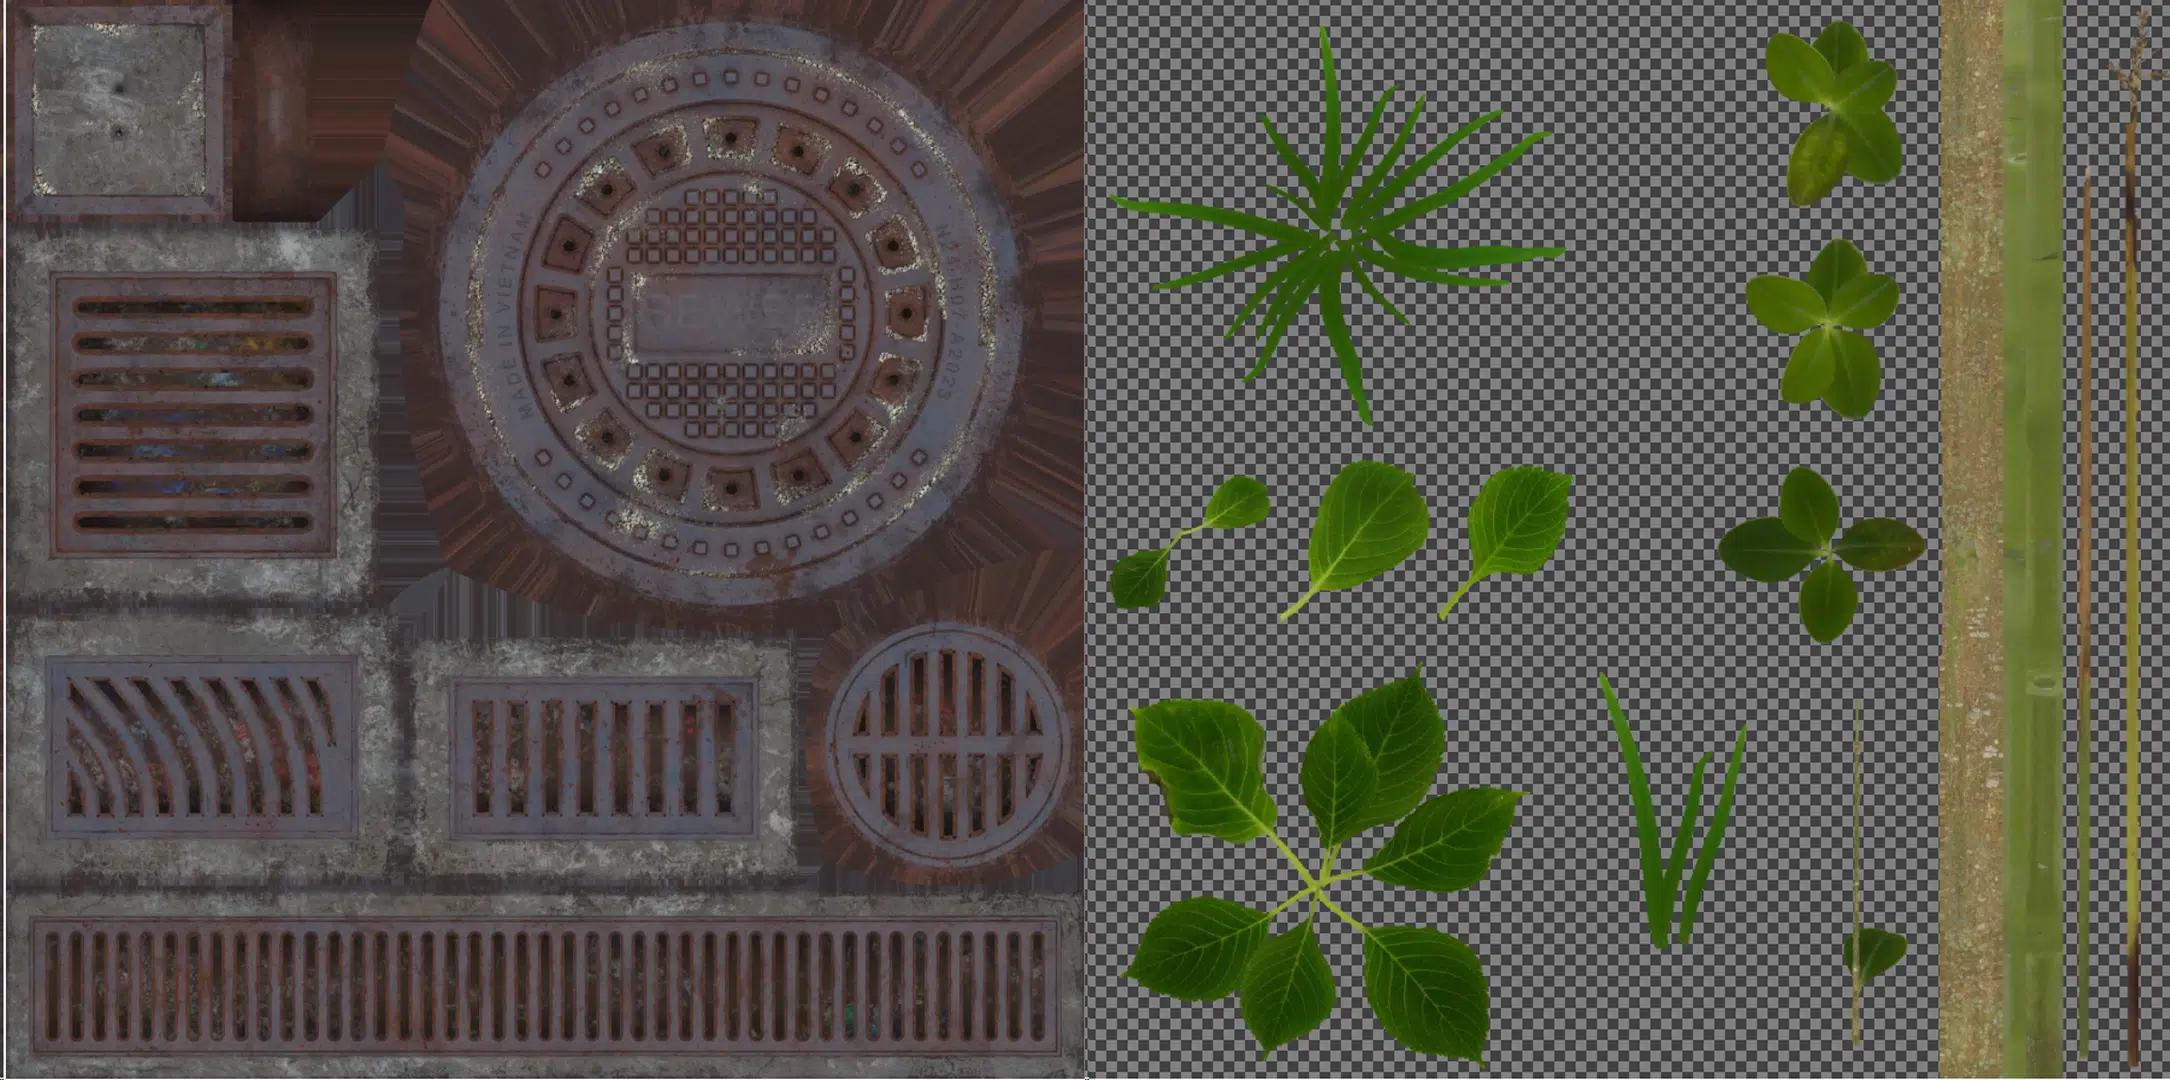
Textures used in Post Apocalypse City Package
In addition, the pivots of the assets are set up reasonably, making rotation, movement, and pairing of assets easier and more accurate, helping to save time and improve work efficiency.
Assets with Transform Gizmo
ASSEMBLING ASSET
What are the problems encountered when importing models and textures to unreal engine 5?
There are a few issues we encountered when transferring models from rendering software to Unreal Engine such as:
ORM Texture Settings: Correcting Occlusion, Roughness, and Metallic (ORM) texture settings and synchronizing measurement units between software prevents delays and ensures a smoother import process.

ORM Map
Sizing Discrepancies: Ensuring measurement units (e.g., meters vs. centimeters) are synchronized between Maya and Unreal Engine avoids size discrepancies.
Asset Naming Conventions: Adhering to correct naming conventions for asset formats (e.g., SM for Static Mesh, T for Texture) is crucial for data management and compliance with Unreal Engine Marketplace standards.
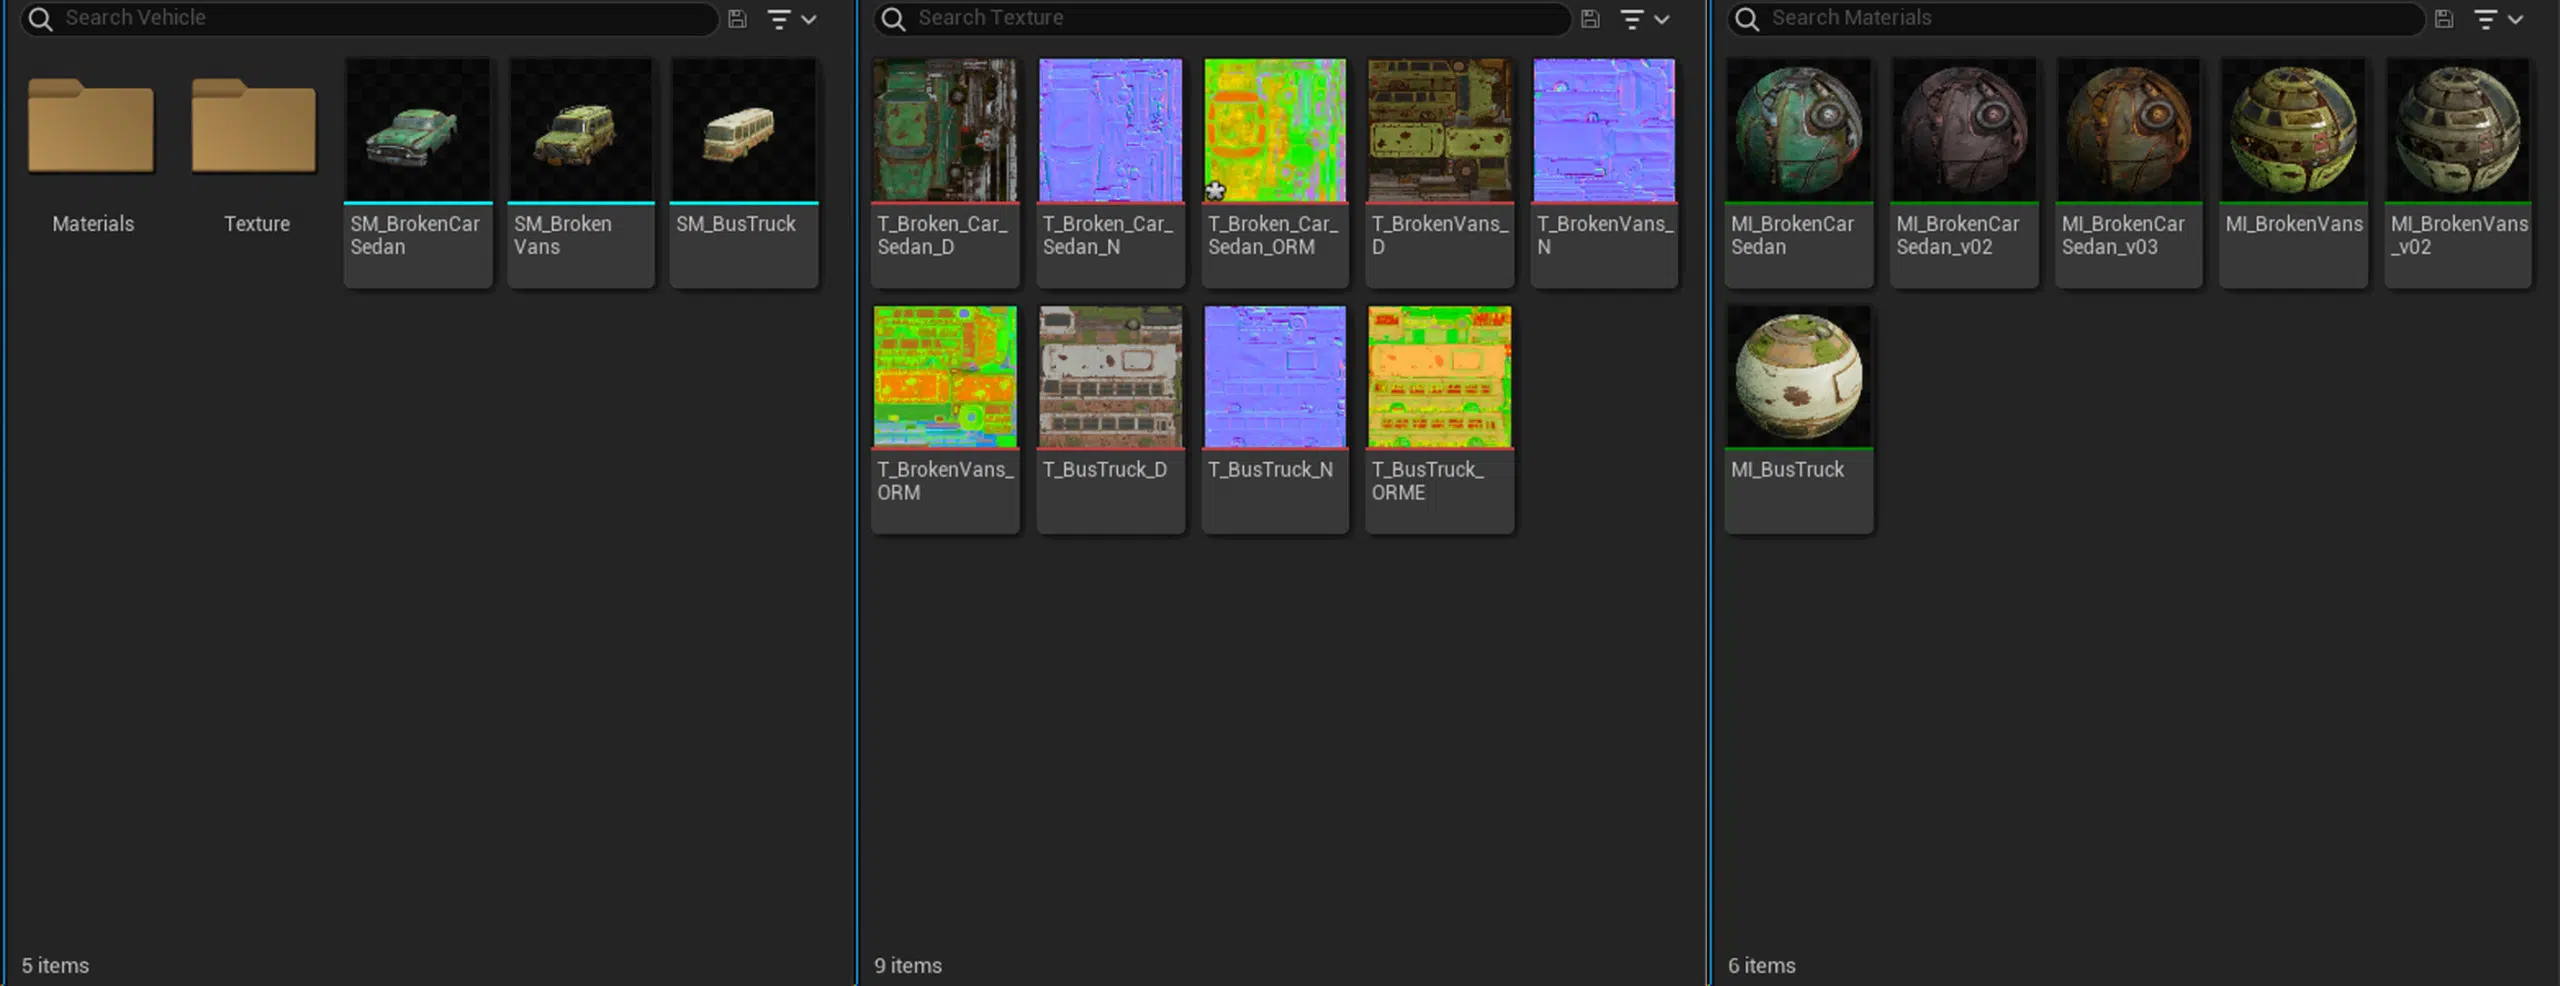
Assets Naming problems
What are the difficulties when assembling the Post Apocalyptic environment in Unreal Engine 5 (UE5) and are there any tips and tricks to overcome the difficulties?
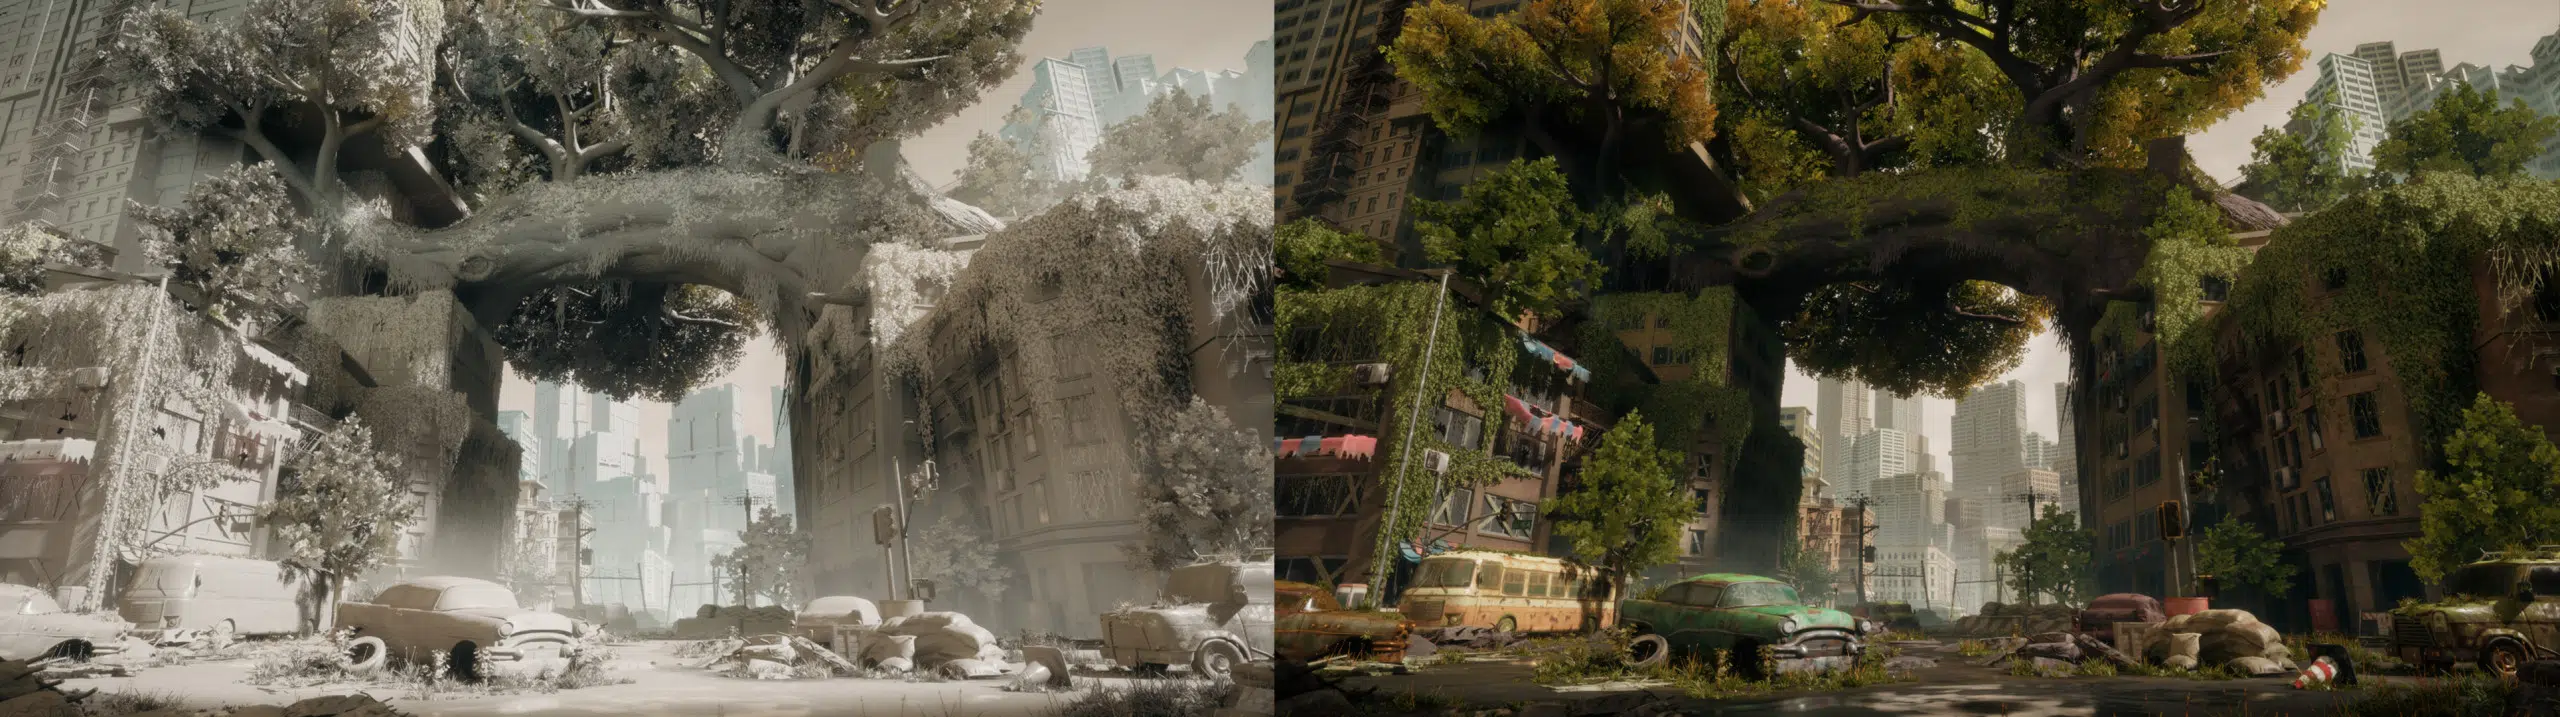
We at Thunder Cloud have found that using vines in 3D can be difficult, especially when you need to manually layer each branch to create a realistic and natural feel. This process is often very time consuming and laborious, and sometimes does not achieve the desired effect if not done meticulously. By using multiple layers of vines on top of each other, you can create richness and depth to the surface, making it more dynamic and not flat.

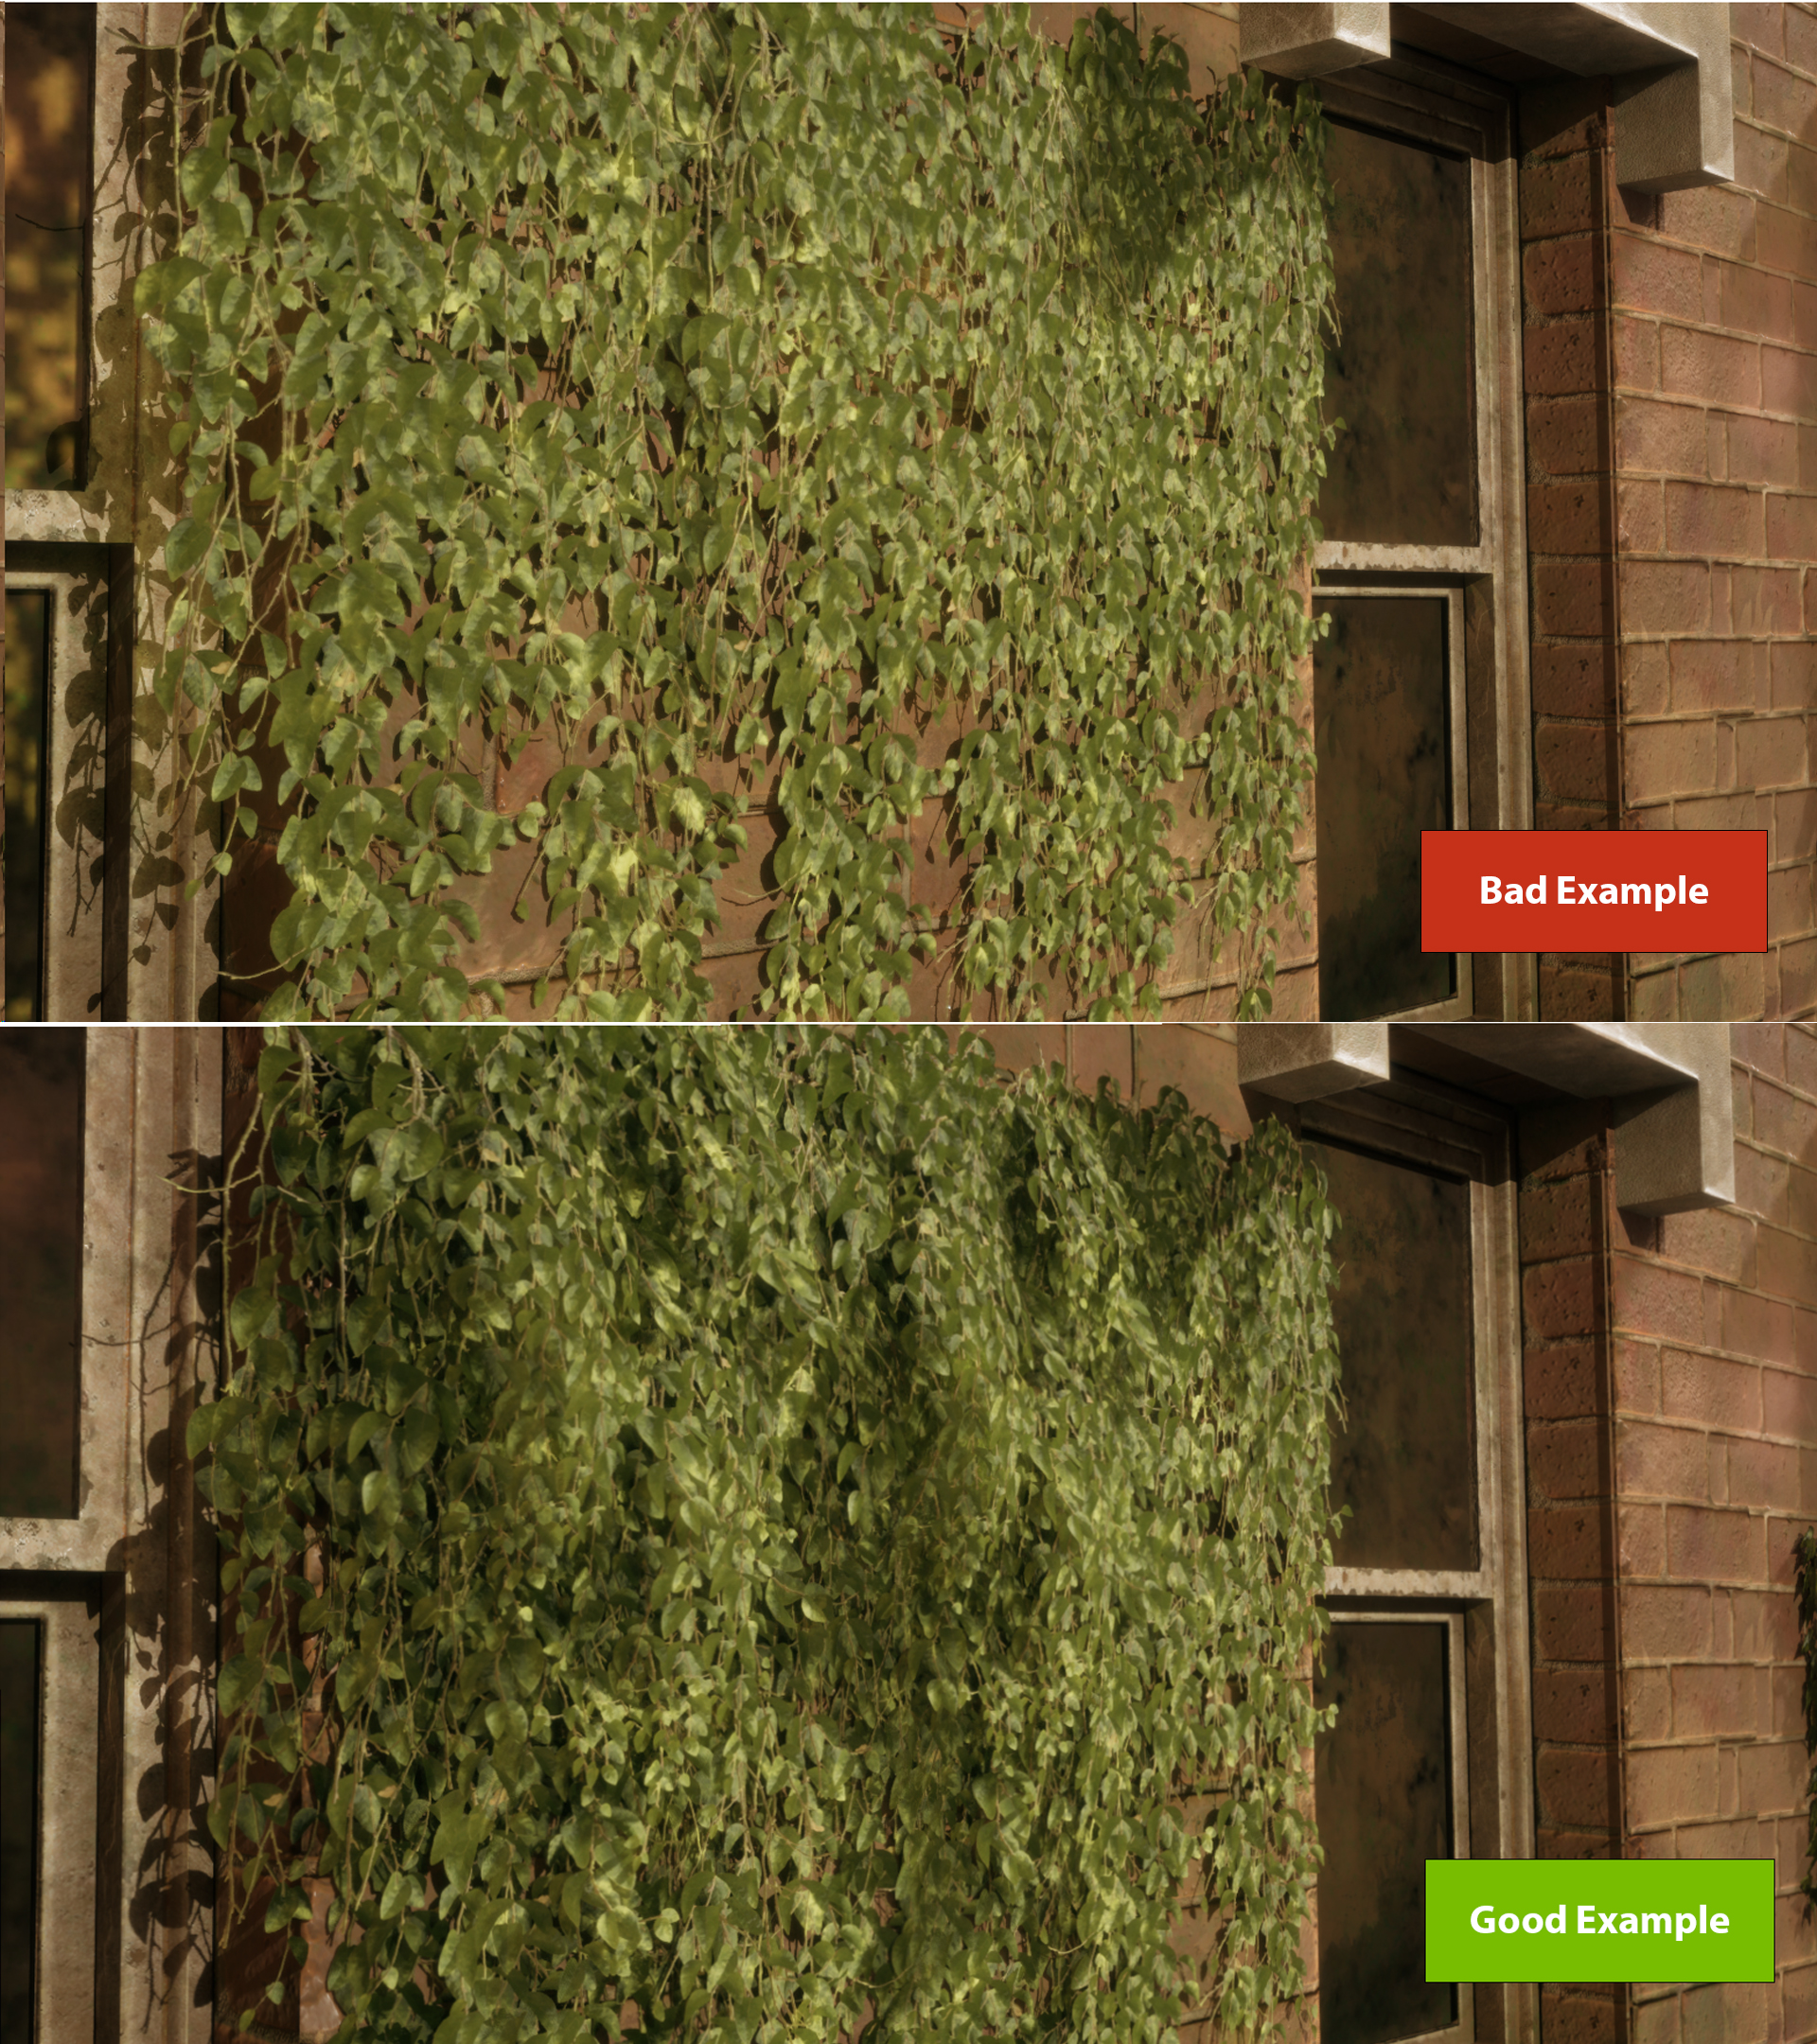
Example for Ivy assembling
We also had trouble with the leaf shader. The shadows on the leaves were too dark especially when the light was insufficient or completely obscured. This made the leaves look pitch black, lacking detail and natural brightness. The solution was to add a slight subsurface and self-emissive so that the leaves wouldn’t be pitch black even when the light was insufficient.
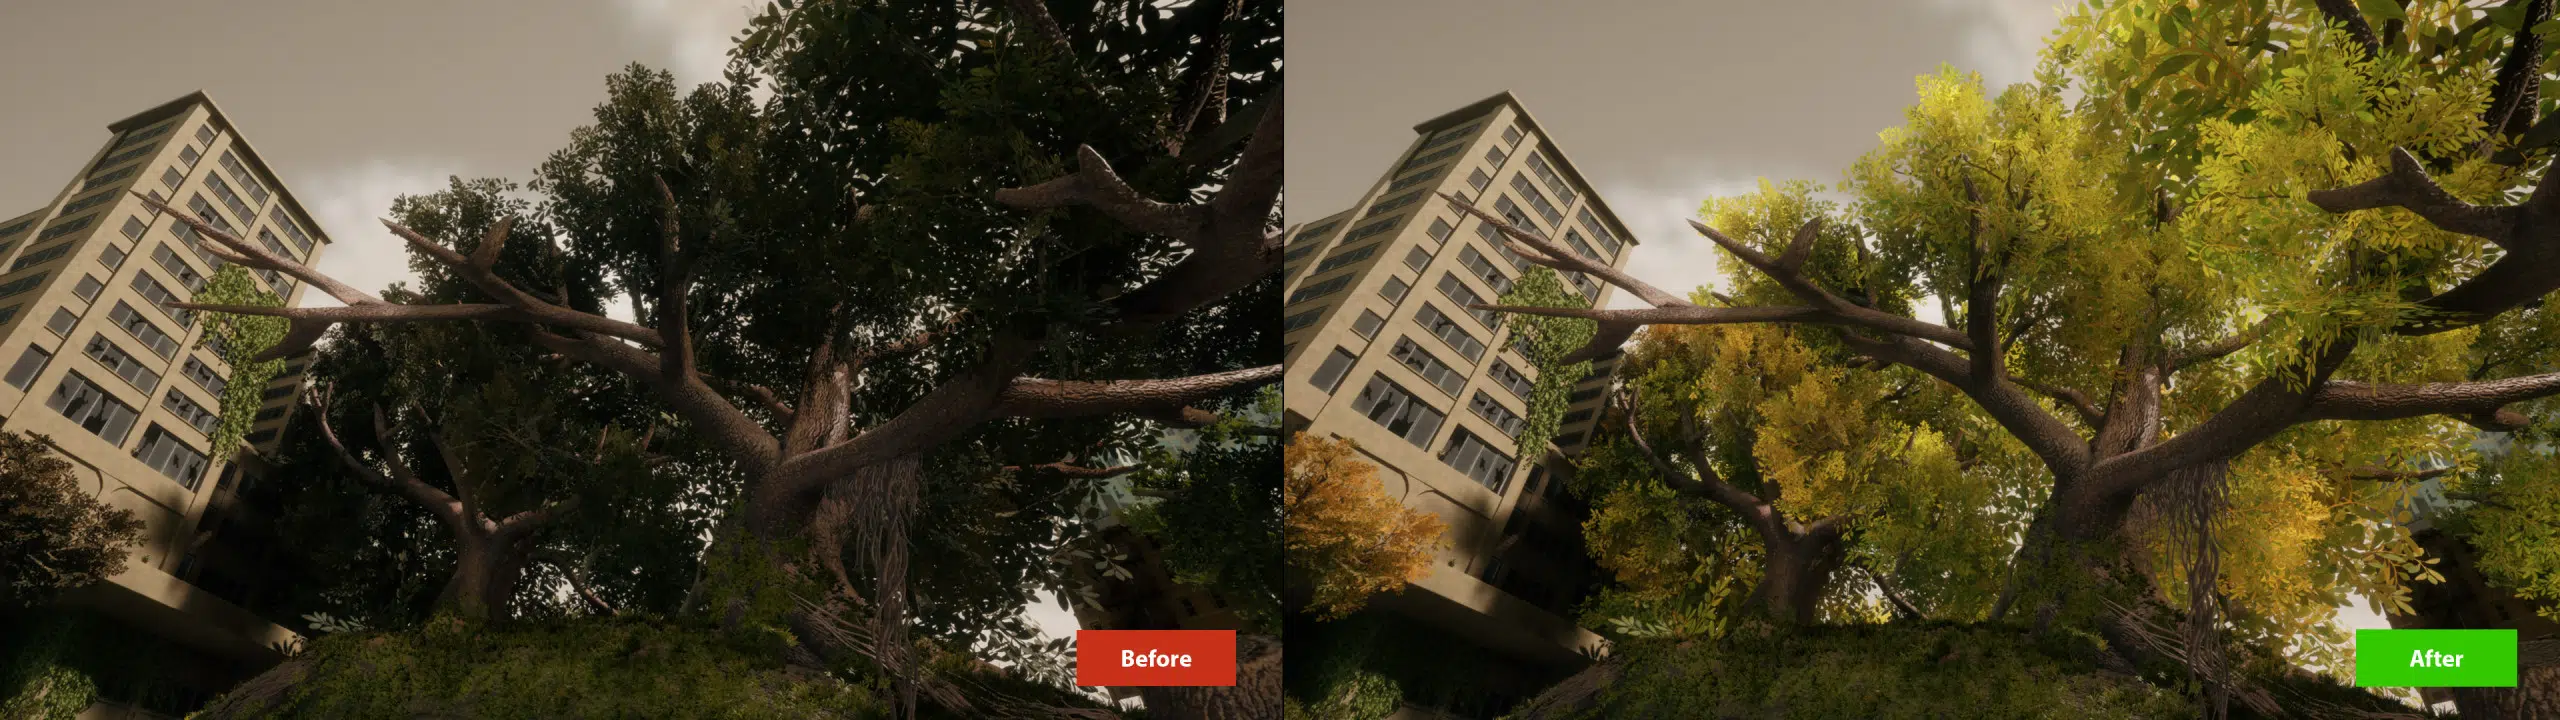
Before & After increase Subsurface in Leaf Shader
With a relatively small number of assets, how can we assemble such a large map?
When it comes to asset variation, Artists at ThunderCloud often use shaders that can change the base color, allowing us to create multiple color variations from a single asset, reducing the number of assets needed and increasing flexibility in color changes. World Space Texture Blending makes the same asset appear in different color variations and details when placed in different locations in space, creating variety without having to waste space on new static meshes.

Buildings Color Variation Shader
With large assets in a 3D environment, you can create variety and richness by combining decals, decorative grunge maps, or adding small assets. Decals can be used to add details such as stains, graffiti, or wear to the surface, making large assets look more dynamic. Grunge maps help create the effect of dirt, cracks, and wear, making the surface of the asset more realistic and non-uniform. By adding small assets such as decorative details, windows, doors, or secondary architectural elements, you can enrich large assets and break up the repetition. This combination helps create a more dynamic and engaging 3D environment.
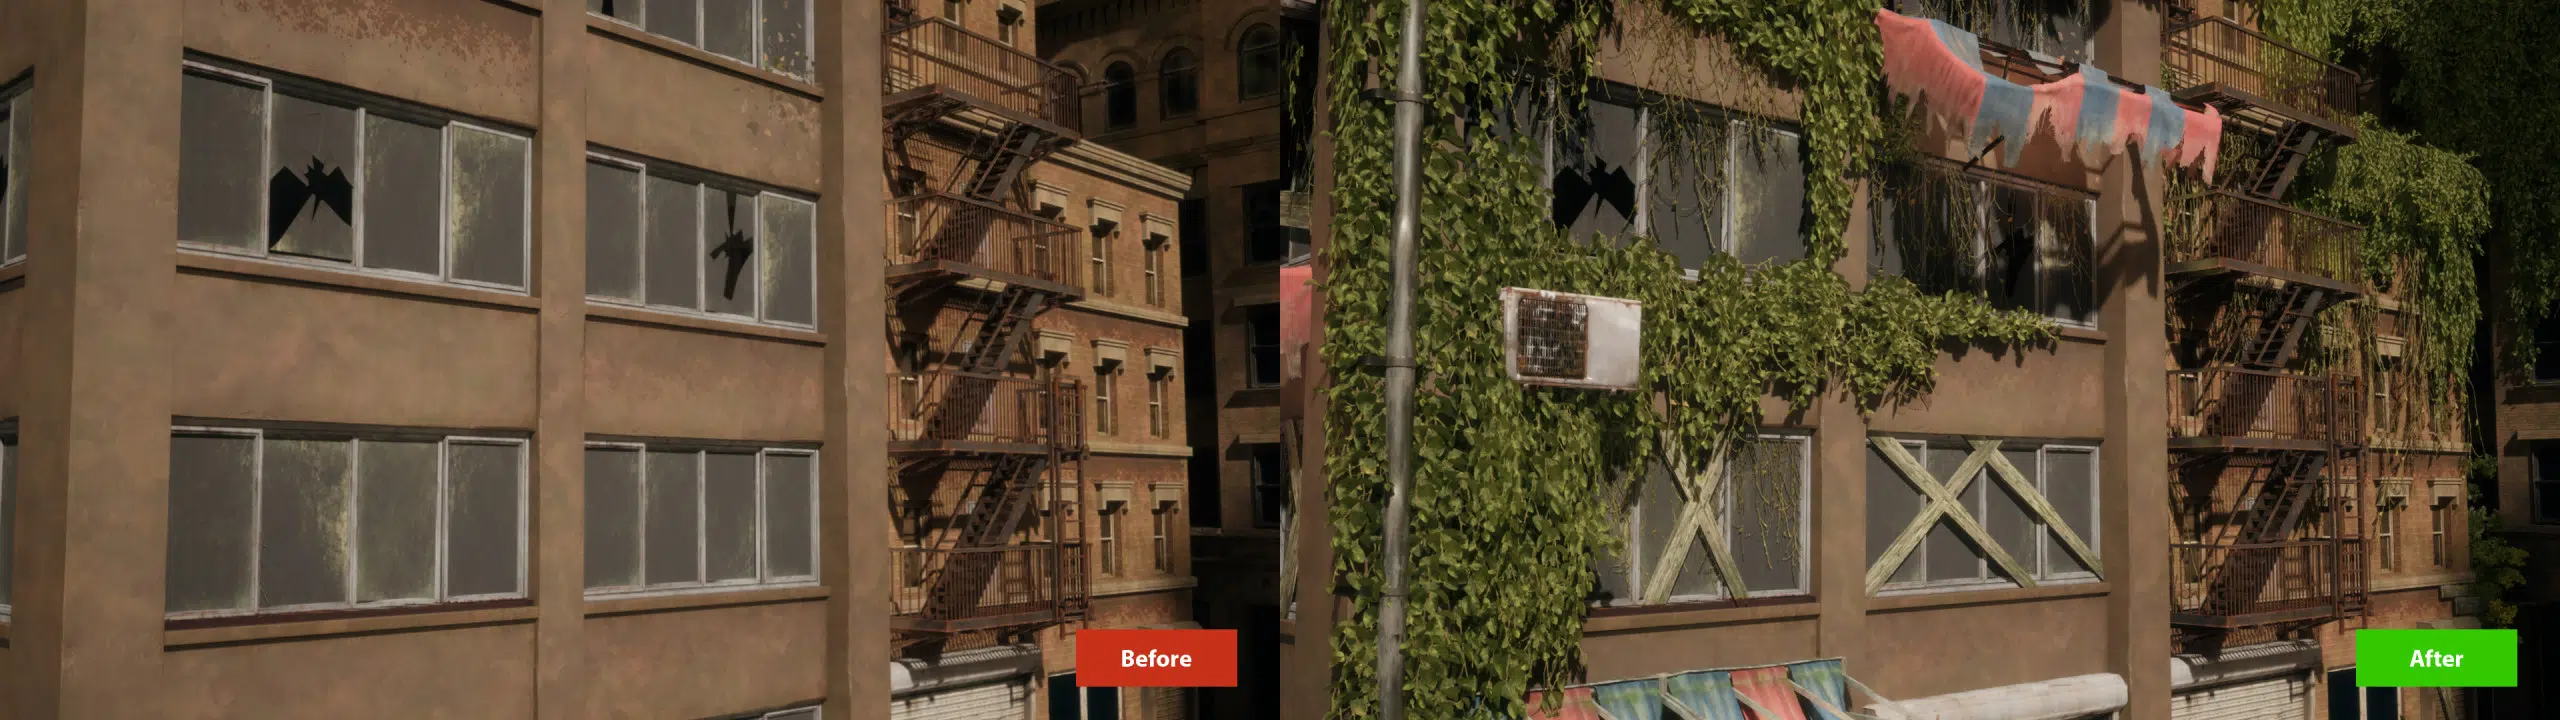
Before & After Set Dressing
The Post Apocalyptic environment in UE5 has many elements of desolation and ruin. How to arrange these elements while still ensuring harmony in the overall scene?
One of our methods at Thunder Cloud Studio is to arrange debris in the environment in clusters rather than just scattered throughout the environment. These clusters of debris were placed intentionally, creating specific groups rather than being randomly distributed. This organization helps to enhance the realism of the scene, creating pauses, making the intersections between large pieces more obvious.

Good & Bad Cluster Setup
What’s special about the shaders for the Post Apocalyptic environment in UE5? (Vertex paint, custom masks, etc.)
From Thunder Cloud ‘s workflow & optimization point of view, Shaders are designed to introduce variation through world-space noise textures, creating random patterns that enhance surface diversity. Foliage shaders with Wind Effects simulate movement in trees, adding realism. Additionally, Paint Vertex functions on assets allow for the creation of weathering, grunge, and dirt effects. Landscape materials enable blending multiple textures, leveraging Unreal Engine’s landscape paint function for seamless integration.
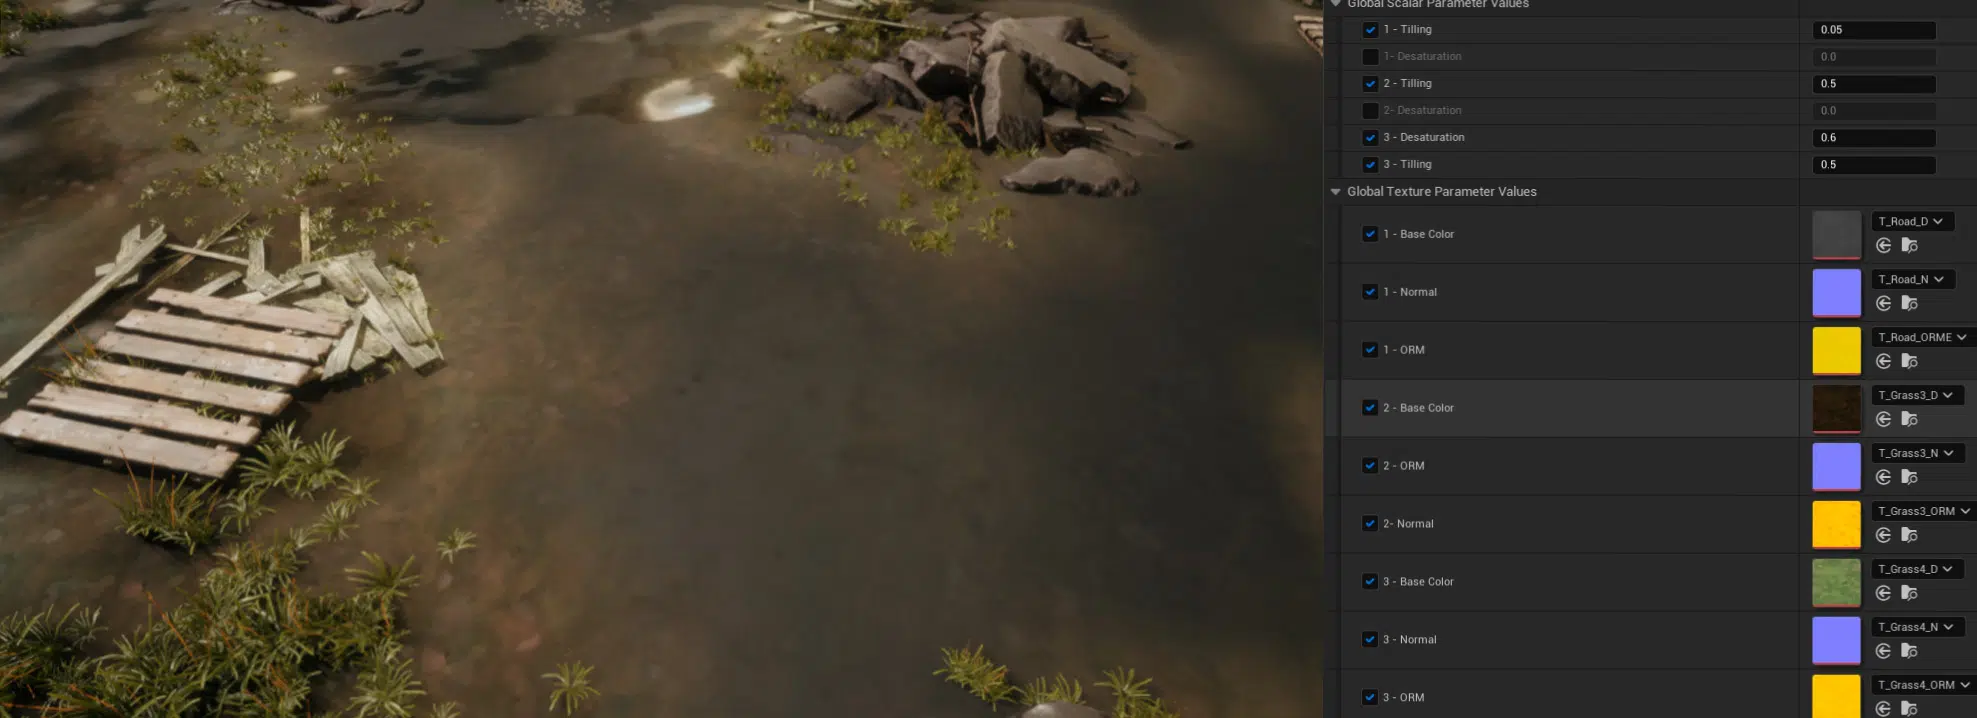
Landscape materials
What is the approach for larger assets like giant trees, skyscrapers, etc.? Do such assets need any different processing or are they still modeled and textured like regular assets?
For larger assets, we would break them down into smaller modules and put them together and the larger modules will be imported directly for ease of use and the smaller parts will also be included as separate assets. These modules can include elements such as walls, windows, columns, or other structural details. When the modules are put together, they form a complete structure without having to create a single large asset.


Are weathering and damage in the post apocalyptic environment in UE5 handled in the same way? (Decal, shader, debris, foliage, etc.)
At Thunder Cloud, We would combine all three elements of decals, mesh debris, and foliage to create a rich and realistic environment:
Decals: Used to add grunge and dirt details to surfaces. Decals can create stains, scratches, graffiti, and signs of wear, adding detail and realism to surfaces such as walls, floors, and other structures. Applying decals helps highlight the wear and tear and effects of time on objects in the environment.
Mesh Debris: Used to add large destruction elements such as pits and big debris piles. Mesh debris includes 3D objects such as debris, broken bricks, and destroyed structural elements, creating damaged scenes and adding realism to heavily impacted areas. These elements create a sense of devastation and environmental change due to major events.
Foliage: Used to create natural elements that reclaim the city. Foliage includes plant elements such as trees, vines, and weeds, which help recreate natural landscapes in urban environments. Adding foliage creates a sense of restoration and the invasion of nature into abandoned or damaged areas, making the landscape more vibrant and rich.
Viewport ingame pack Appocalypse City
LIGHTING/RENDER
How to light a scene with the Post Apocalyptic theme (How to determine the mood and tone? What workflow and tools to light that mood/tone?)
First of all, we need to use lighting to determine the mood/tone of the scene.
Start with Skylight to get the overall lighting, the whole scene needs to be clearly visible without losing details from this step.

Sky light
After that, we use directional light to create contrast.

Sky light + Directional Light
Next, we add fog to add depth and limit the viewing range.
Sky light + Directional Light + Fog
Lastly, we add small additional lighting to support areas that are too dark or add focus on special areas.
Sky light + Directional Light + Fog + Local Lights
Were there any rendering issues? How to solve translucent leaves without ray tracing? How to solve artifact shadow of foliage without ray tracing?
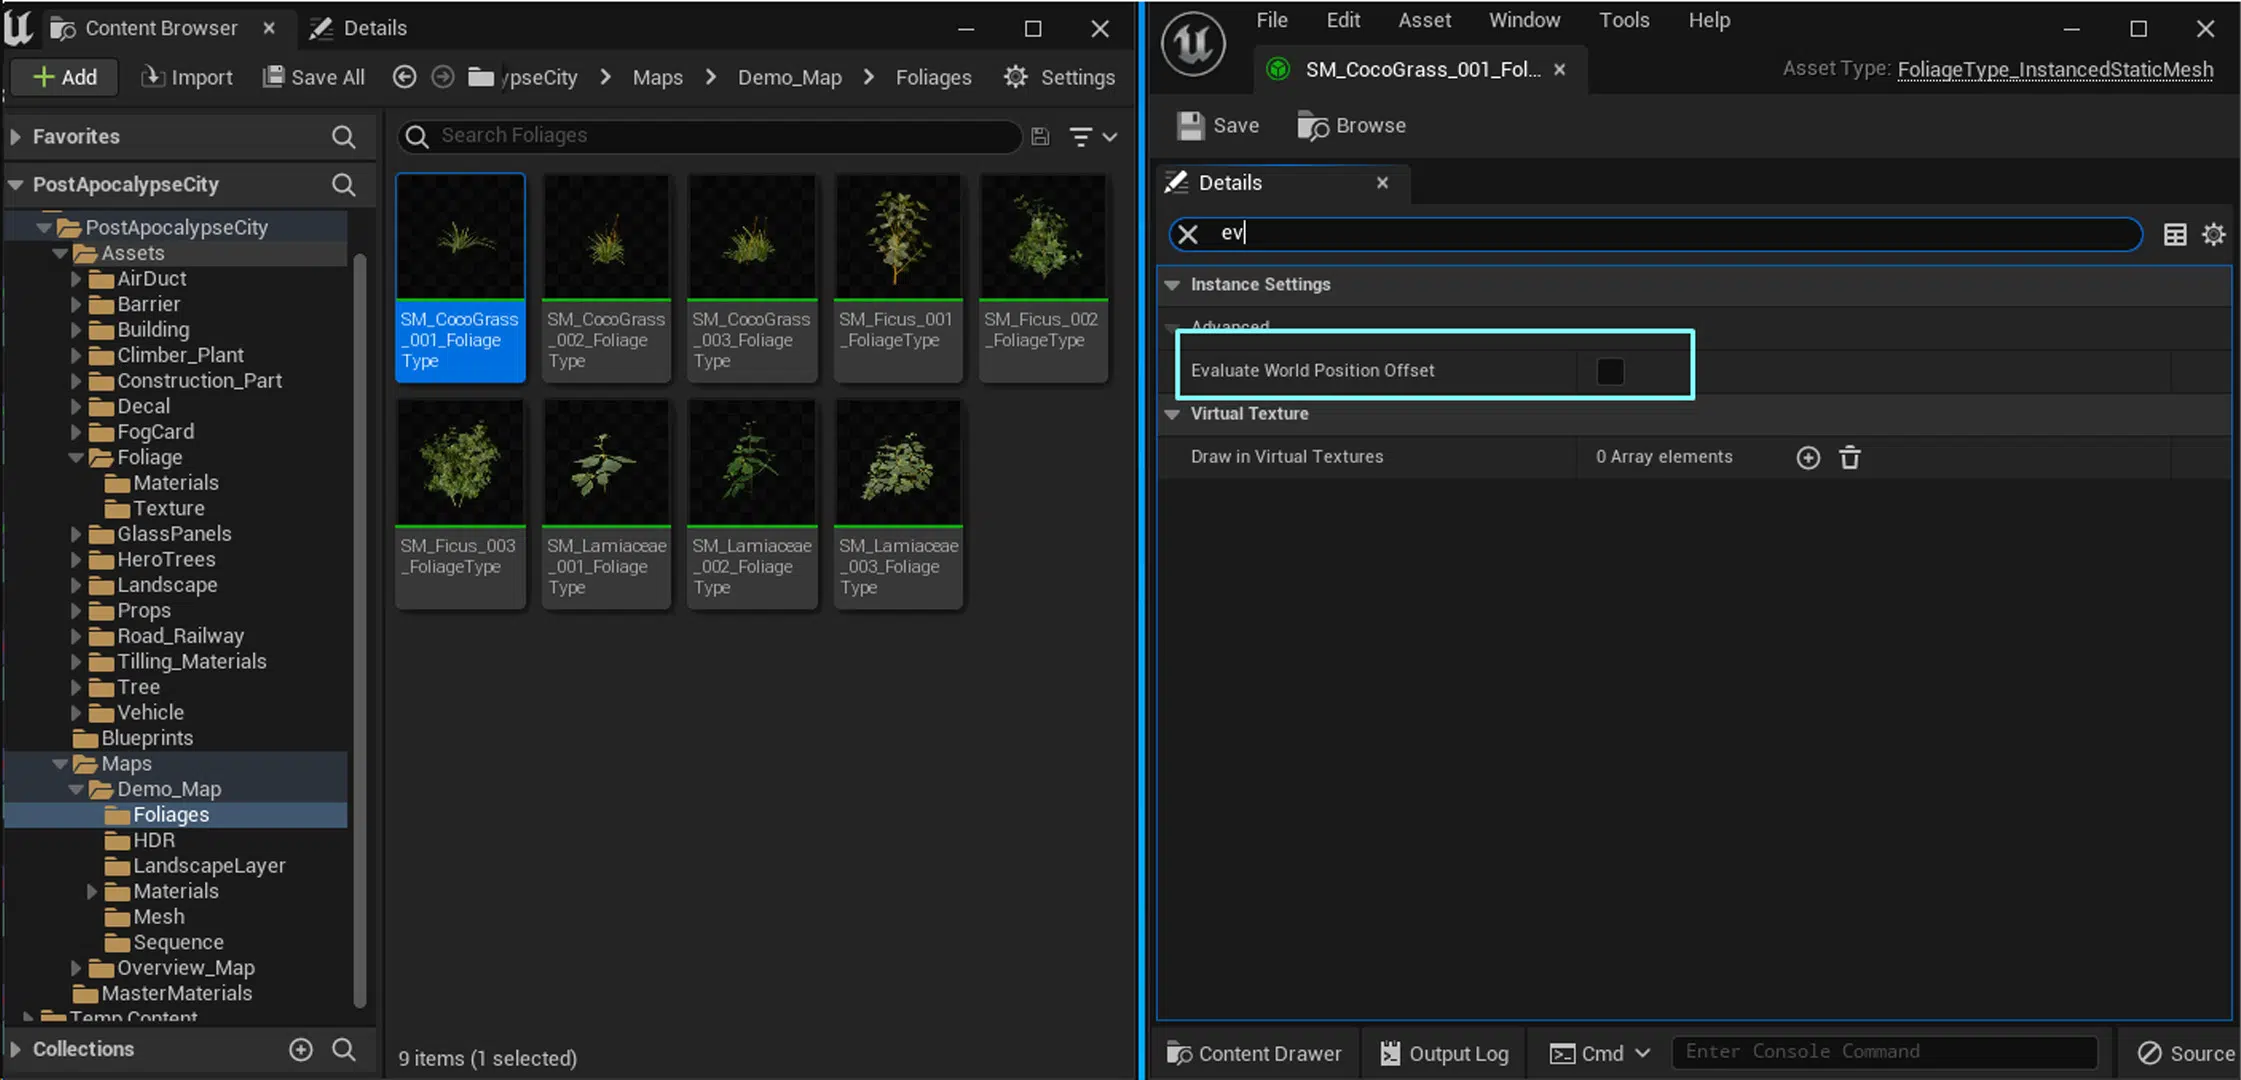
For the foliage shadow problem, the solution is to create the foliage as an Actor Foliage and enable the Evaluate World Position Offset option:
– Create Foliage as Actor Foliage: By using an Actor Foliage, the foliage is managed as an actor.
– Enable Evaluate World Position Offset: When the Evaluate World Position Offset option is enabled, the foliage will apply world position variations to more accurately calculate the shadows.
FINAL THOUGHTS
What lessons are learned from making the post apocalyptic package and what can be improved?
This is a high quality project and while working on it, we as Thunder Cloud Studio encountered many problems. We really learned a lot through this project. It was a good opportunity for us to improve our skills and beat our weaknesses.
By integrating these efficient workflows and techniques, the team at Thunder Cloud has significantly speeded up the development of the Post Apocalypse City Asset Pack. Our structured approach to concept development, asset production, Unreal Engine integration, and lighting ensures a streamlined process that maintains high quality while meeting project deadlines. This systematic and strategic workflow not only enhances productivity but also elevates the overall quality of the final product.
If you are interested in the Post Apocalypse Pack or our other products, below are the links to our FAB for purchase and our Artstation portfolio showcase. Thank you for your interest and reading the article.
Purchase Post Apocalypse City Asset Pack on FAB
See the full showcase on Artstation.